緣由
原本想要一個較個人風的 email
參照 網路上 得知 Google Domains 不只提供 domain 同時提供指定 email 轉寄的功能
就直接照 這篇 來購買一個 domain
Google 相較其他網域商,雖然價格貴一點點,但每年價格都很一致
不像有些強打第一年優惠但第二年以後價格快翻倍跳反而比 Google 的還貴
在這邊最便宜的一年 9 USD,商用字詞的約 1X USD 即可入手 (我是買 12 USD 的)
設定 Email 轉寄
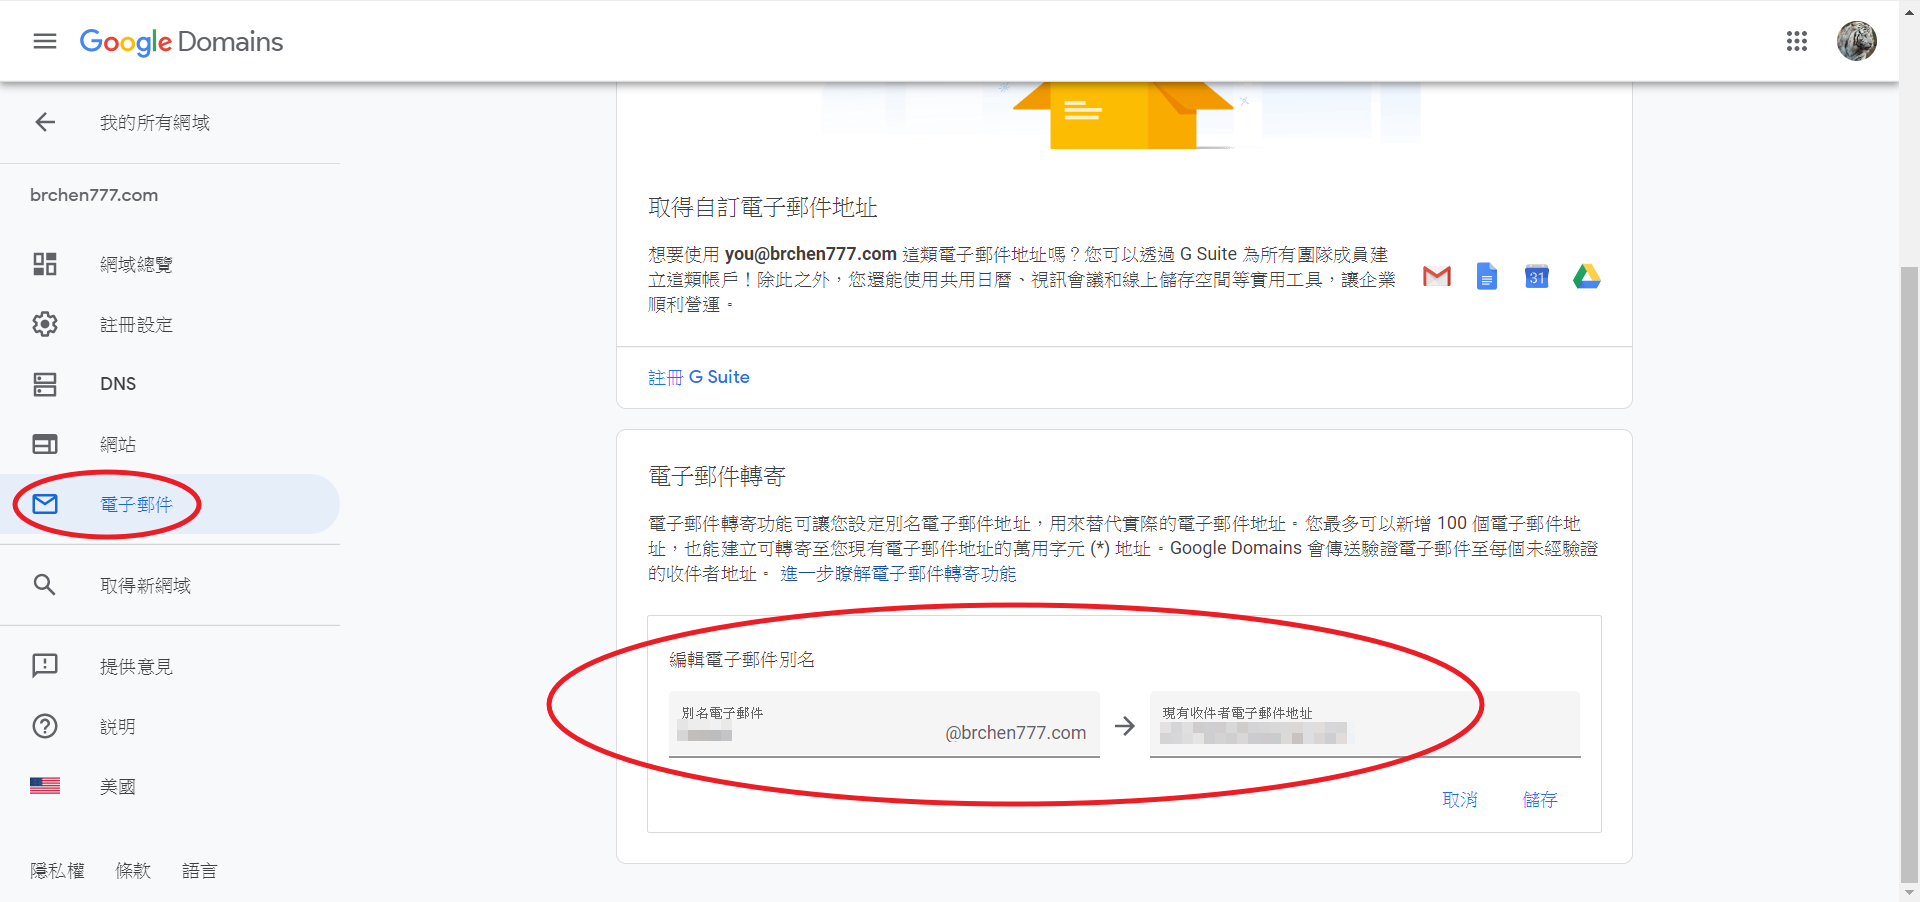
購買網域後,進入設定頁 -> 電子郵件
最下方 “電子郵件轉寄” 填入你想要的別名與轉寄的地址,儲存後就會轉寄了

利用 Hexo 與 GitHub Page 建立免費的靜態 Blog
所需環境與工具
建立一個 Repository
登入 GitHub
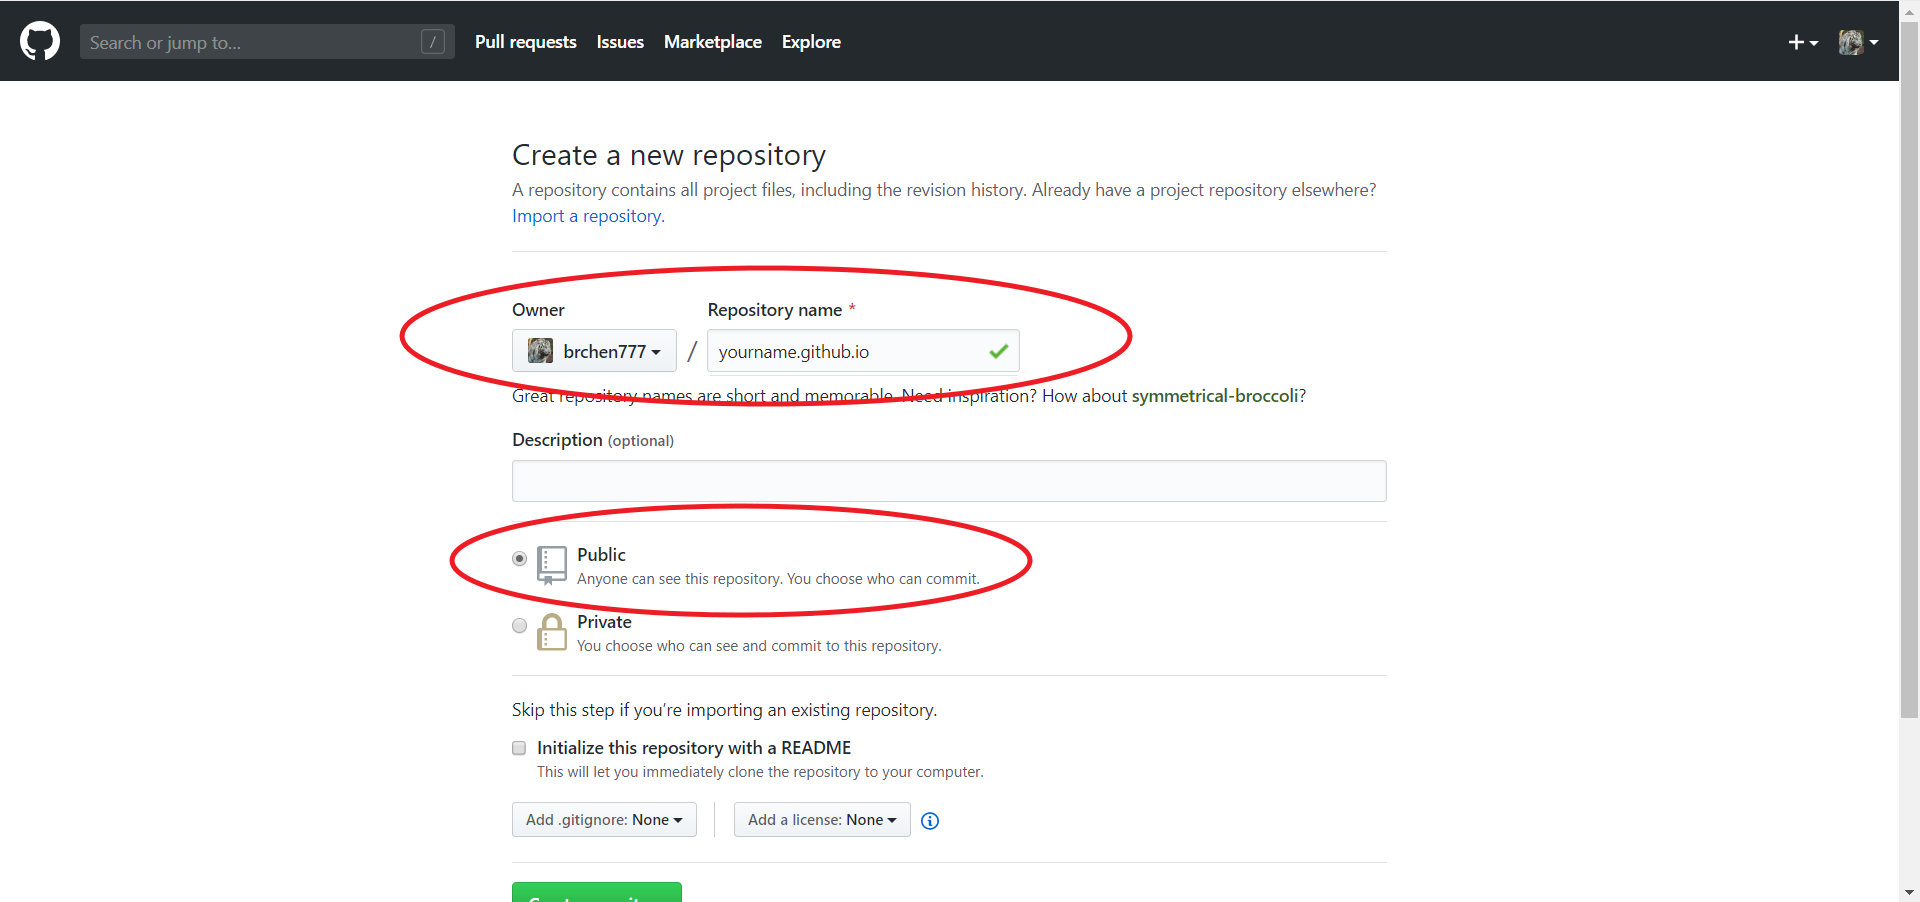
建立 Repository
name 填入
yourname.github.io(yourname 請改成你的 GitHub ID)
下方的 type 記得請勾選 “public”
安裝 Hexo
1 | $ npm i hexo-cli -g |
安裝 Hexo Git
1 | $ npm i hexo-deployer-git |
安裝 Blog 主題
這邊我們以安裝 minos 為例子
其中 minos 需要 hexo-renderer-sass 這個套件
1 | $ git clone https://github.com/ppoffice/hexo-theme-minos.git themes/minos |
調整設定
在 blog 資料夾內可以看到 “_config.yml” 這個設定檔案
打開後在中下方有個 theme 的部分改成:
1 | theme: minos |
最下方 deploy 的部分則改成:
1 | deploy: |
這裡的 “yourname” 改成你的 github 帳號
其他更詳細的設定可參考 這裡
開啟 Server
1 | $ hexo s -p [port] |
預設在 http://localhost:4000 看 Local Page (裡面會有一篇 Hello World)
建置靜態網頁
把 Markdown File 轉成網頁
1 | $ hexo g |
發佈到 GitHub Page 上
1 | $ hexo d |
或是你也可以建置、發佈一起做
1 | $ hexo d -g |
網站轉址
既然我們已經有 Google Domain 跟 Hexo + GitHub Page 產的 Blog,該是串起來的時候了
設定 DNS
到 Google Domains 設定頁 -> DNS -> 自訂資源紀錄
添加一筆 Type A,IP 如下:
- 185.199.108.153
- 185.199.109.153
- 185.199.110.153
- 185.199.111.153
再添加一筆 CNAME:
name 填 subdomain (例如 “blog”)
data 填 yourname.github.io (yourname 請改成你的 github ID)
填完顯示如下:
設定 GitHub Page 的 Domain
在 /blog/source 資料夾建立 CNAME 檔案
1
2
$ cd /blog/source
$ touch CNAME檔案內填寫入
1
subdomain.domain.com
假設我的 subdomain 是 “blog”
我買的 domain 是brchen777.com
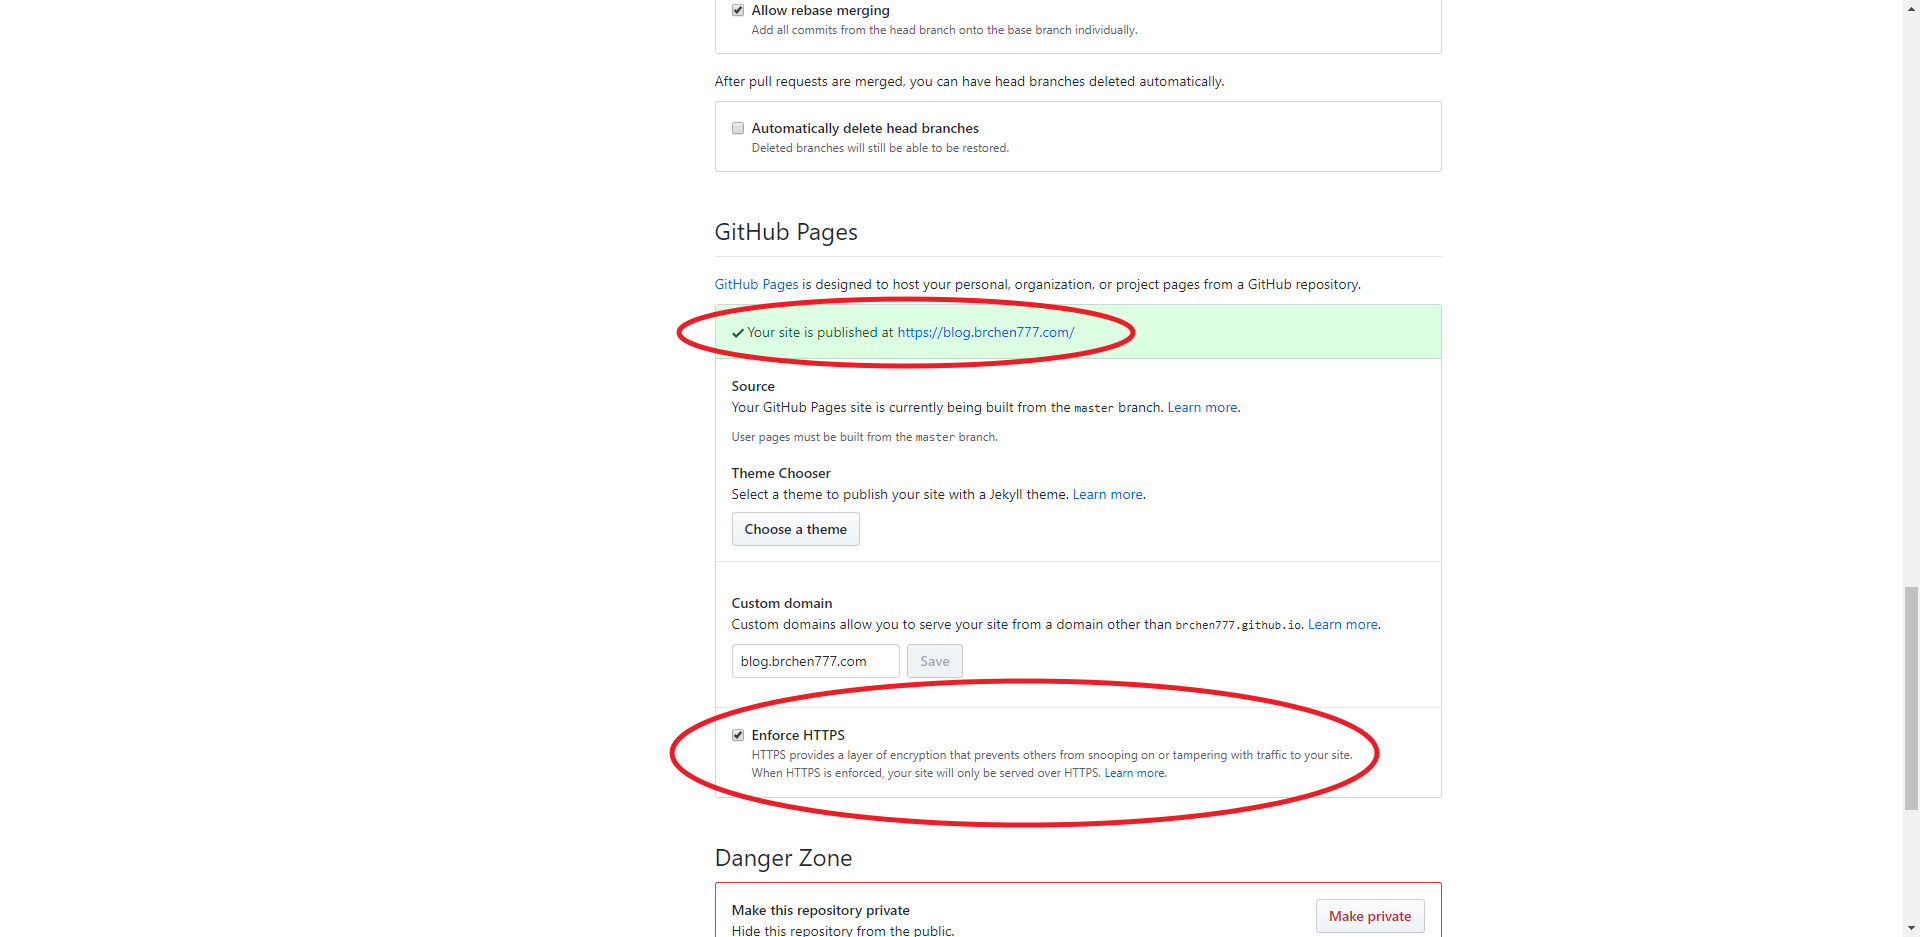
那在這邊要填入的會是blog.brchen777.com假設有填好,進入 GitHub Repository -> Settings -> GitHub Pages 區塊,會有 “Your site is published at XXX” 的訊息,其中 XXX 就是 blog 的網址,顯示如下:

GitHub Page 有內建 HTTPS,網站設定好一段時間之後就有 “Enforce HTTPS” 可選 (如上圖的下方)
設定多個 Subdomain 指向同一個 GitHub Page
因為 GitHub Page 不支援多個 CNAME 設定,所以其他的 subdomain 要自行設定轉址
到 Google Domains 設定頁 -> DNS -> 綜合記錄
假設要把 “www” 這個 subdomain 轉址,新增一筆子網域轉址如下:
以這篇案例來說,www.brchen777.com 與 brchen777.github.io 都會指到 blog.brchen777.com
Comments