#Blog

緣由

上一篇 網誌建完之後只有基本的樣式
可能有額外需求要設定,固寫在此篇

備份

hexo-cli 只上傳轉換後的 html 檔
如需要備份 markdown 原始檔與專案設定檔可安裝 hexo-git-backup

  1. 安裝

    1
    $ npm i hexo-git-backup

  2. _config.yml 增加設定:

    1
    2
    3
    4
    backup:
    type: git
    repository:
    github: http://github.com/yourname/yourname.github.io.git,branchname

    這裡的 “yourname” 改成你的 github 帳號
    “branchname” 改成備份的 branch name

  3. 設定完就能下指令備份:

    1
    $ hexo b

壓縮靜態網頁

這邊是用 hexo-yam
直接下指令安裝:

1
$ npm install hexo-yam

安裝完預設就會會啟動了,無須另外設定
如需特調細項可再去 _config.yml 做額外設定

分享功能

進入文章後預設底下會有 error 區塊
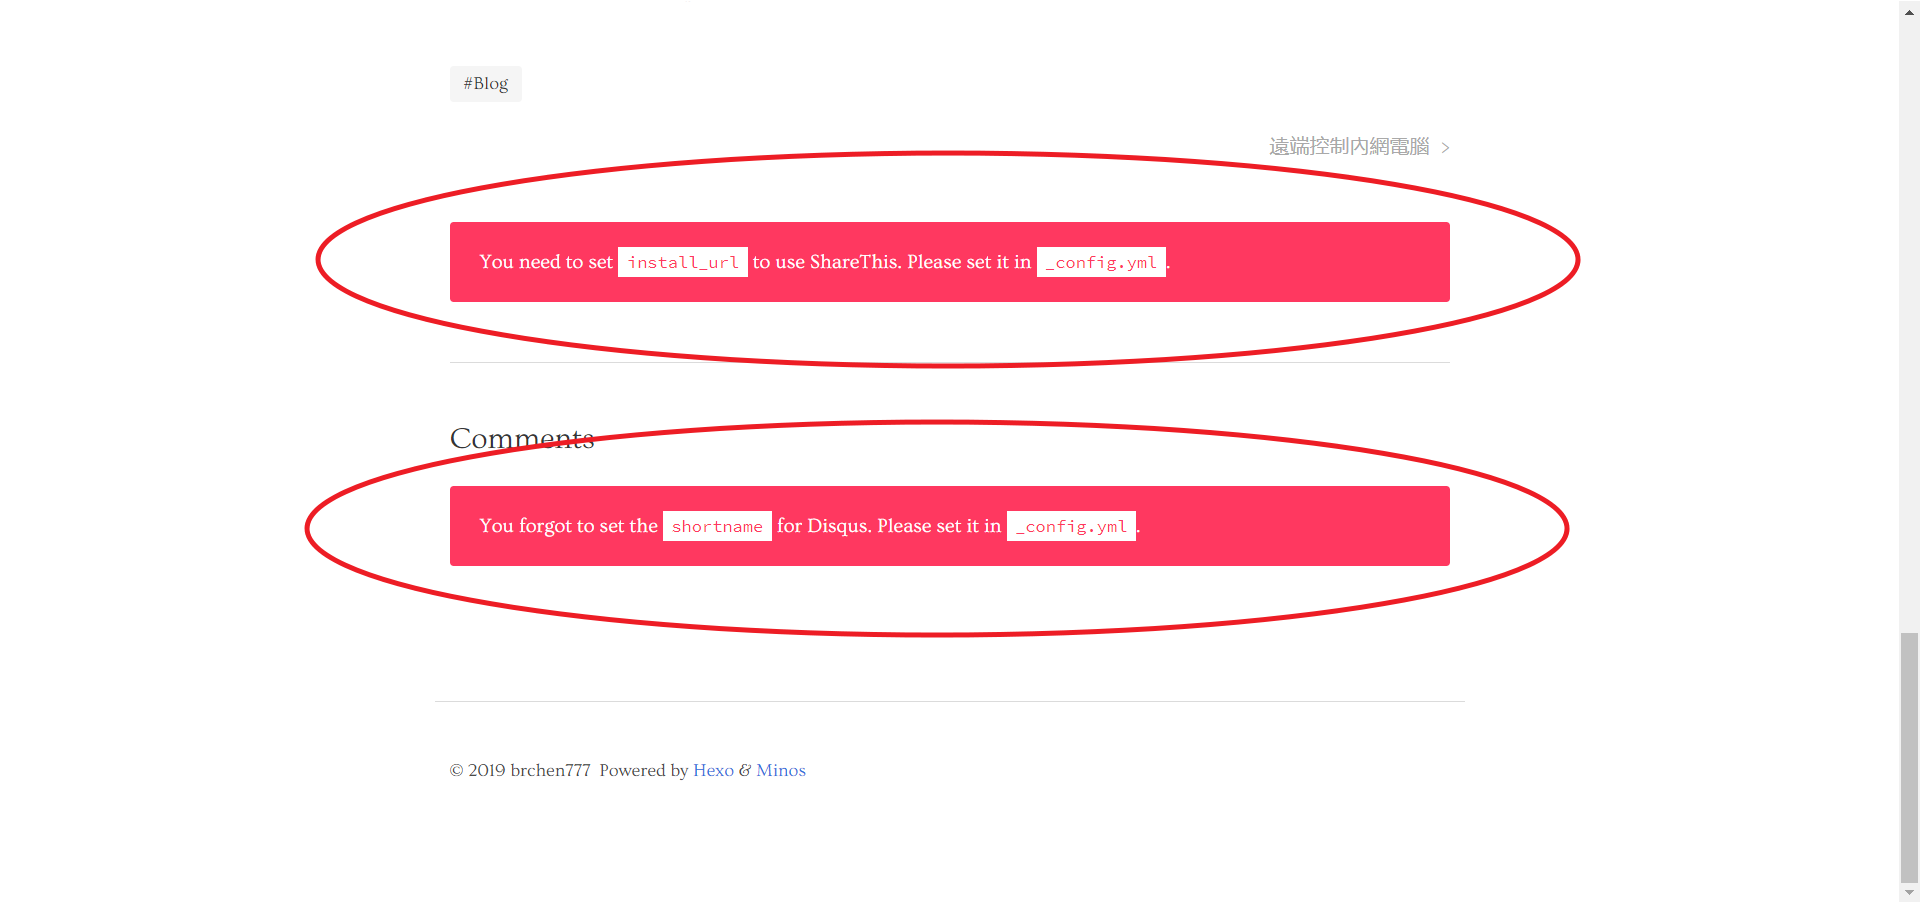
我們可以參考專案的 /themes/minos/_config.yml 檔案

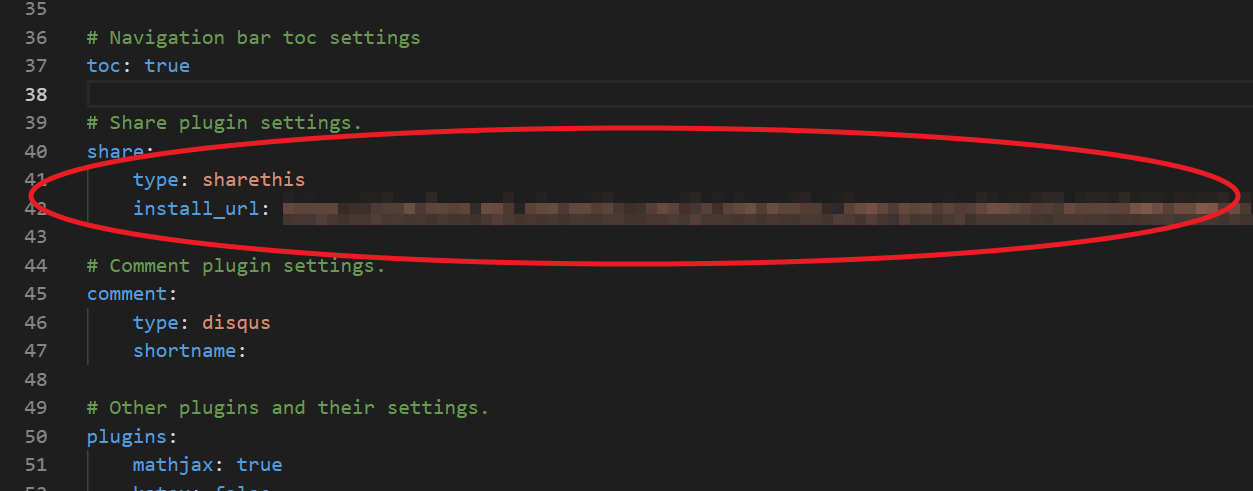
minos 的分享預設是用 sharethis

  1. 註冊一個帳號

  2. 以 Domain 新增一筆 Property

  3. 選擇一個想使用的樣式,裡面可再做細項設定

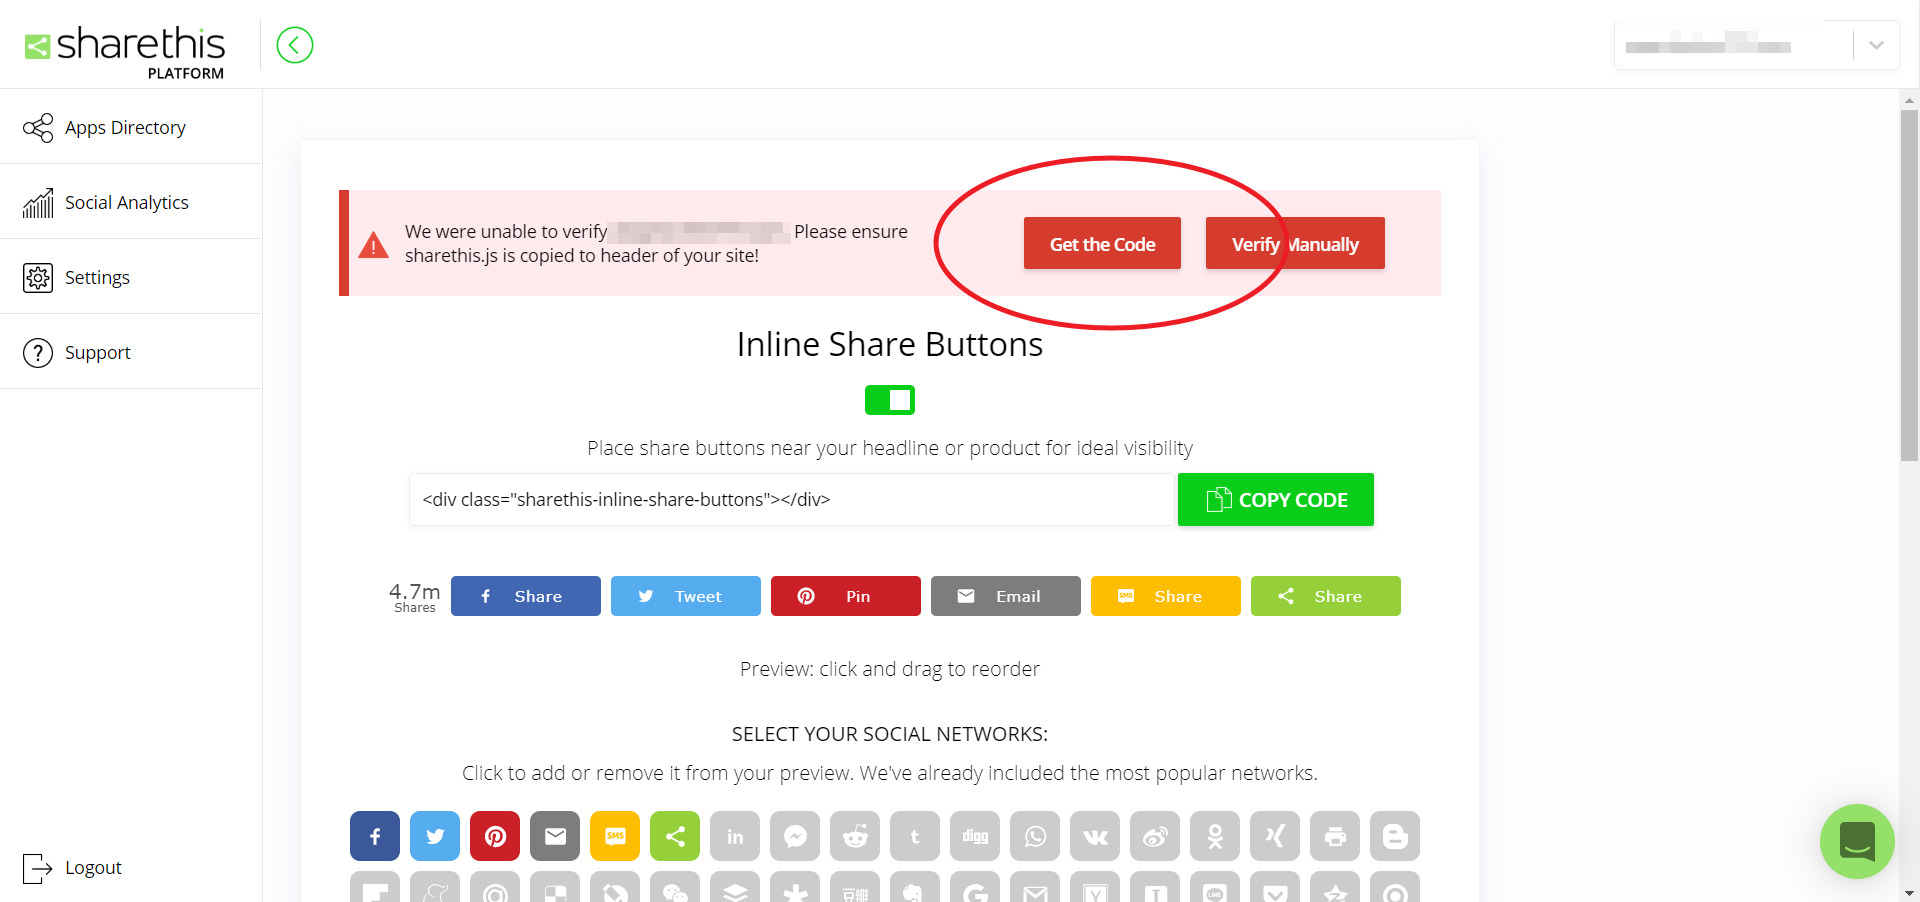
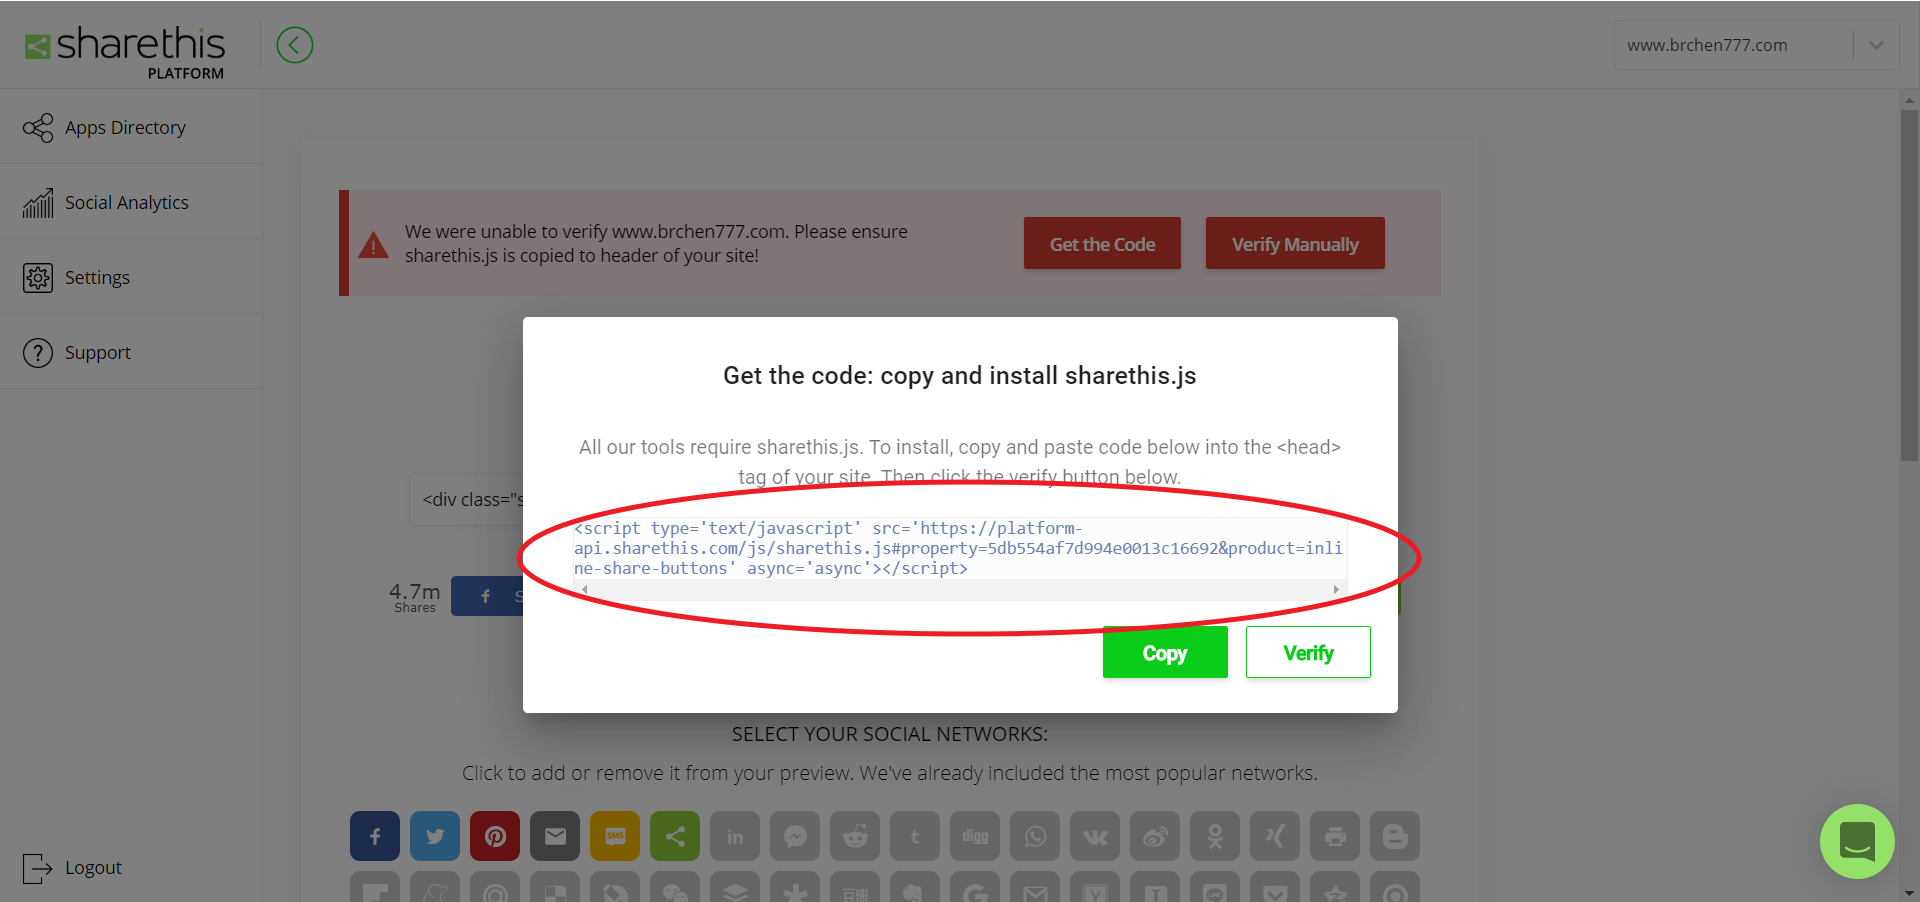
  4. 設定好樣式後點選 “Get the Code”

  5. 複製 js code 的 “src” 的部分 (只要網址就好,不用整個 code)
  6. 網址複製到 /themes/minos/_config.yml 的 “share” 的 “install_url”
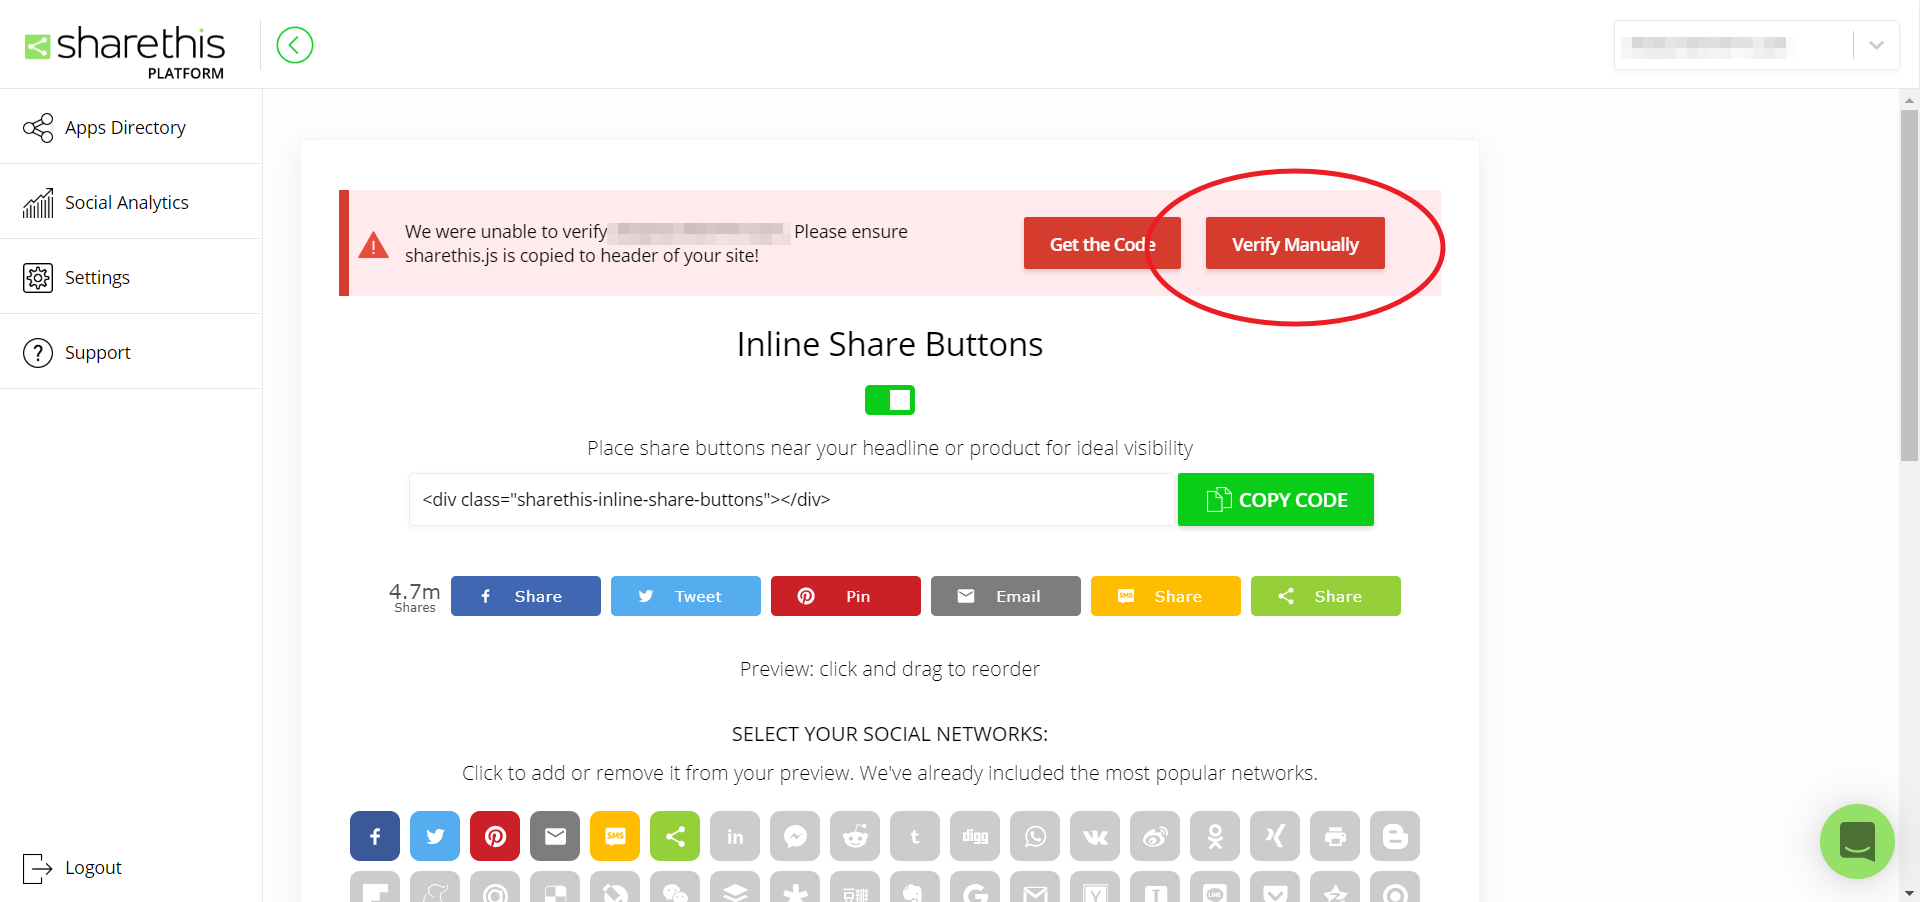
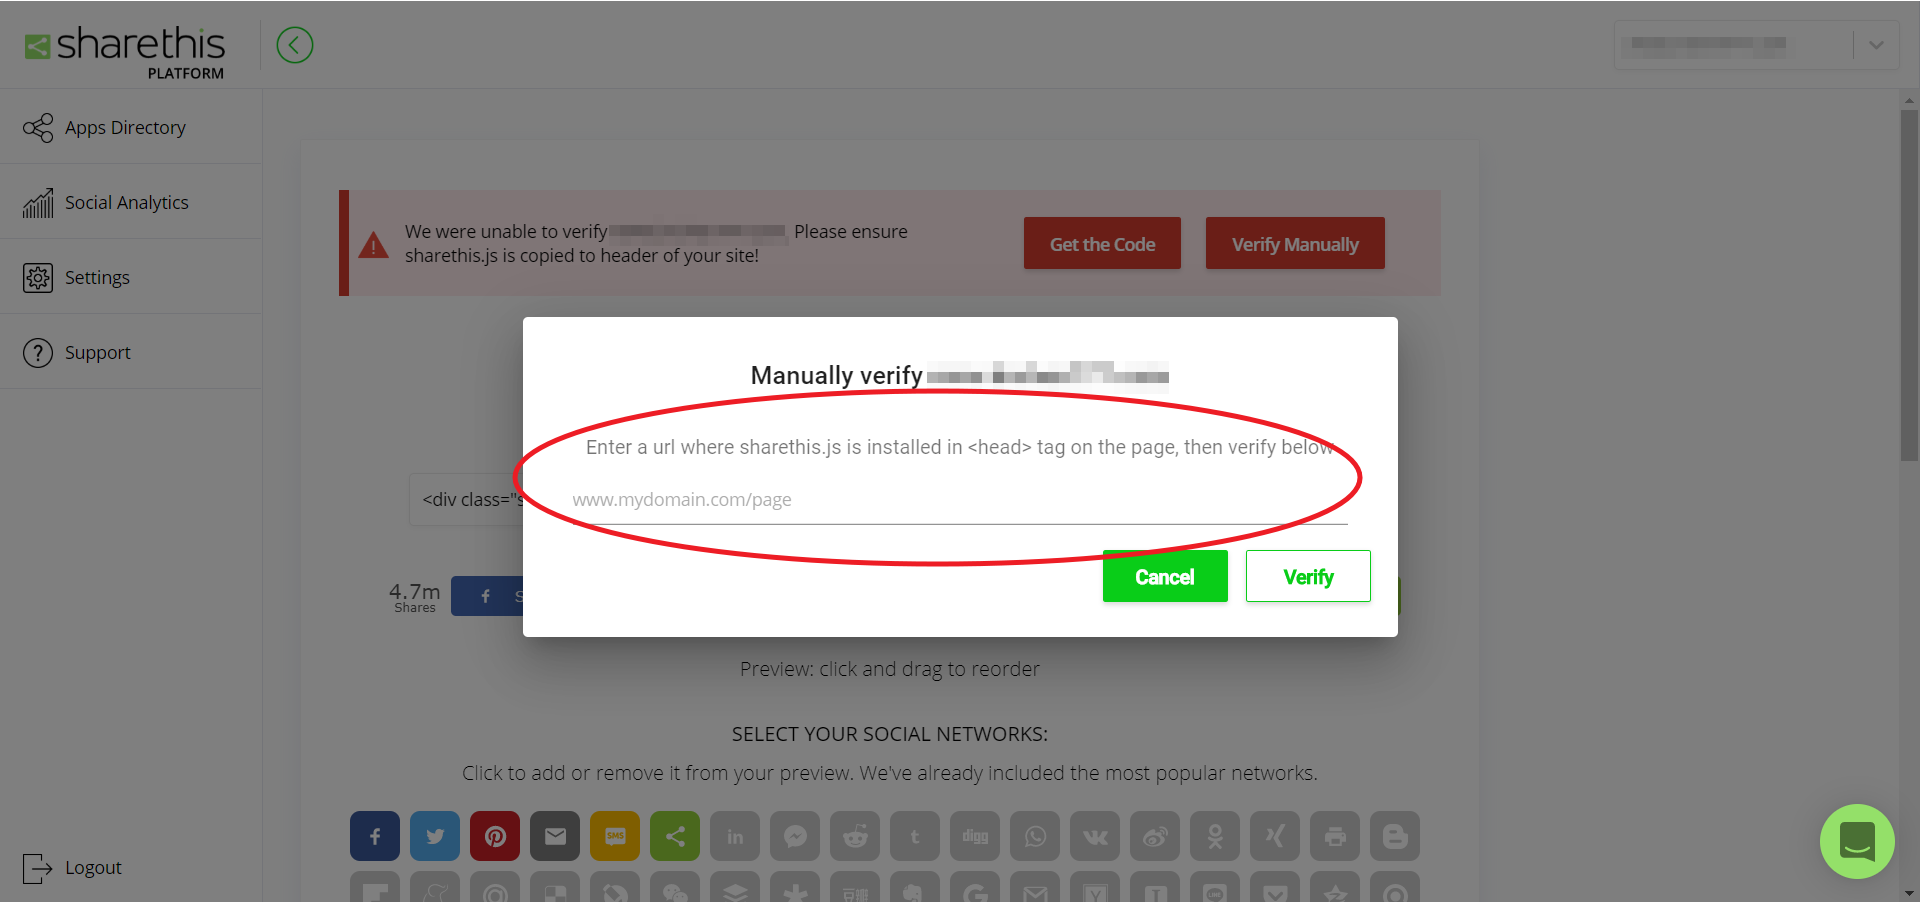
  7. 專案 deploy 後點選 “Verify Manually”

  8. 把線上站隨便一篇的網址複製過來進行檢測,檢測成功的話紅色區快會消失

  9. 設置成功的話網誌倒數第二塊會出現分享功能

留言功能

minos 的分享預設是用 disqus

  1. 註冊一個帳號

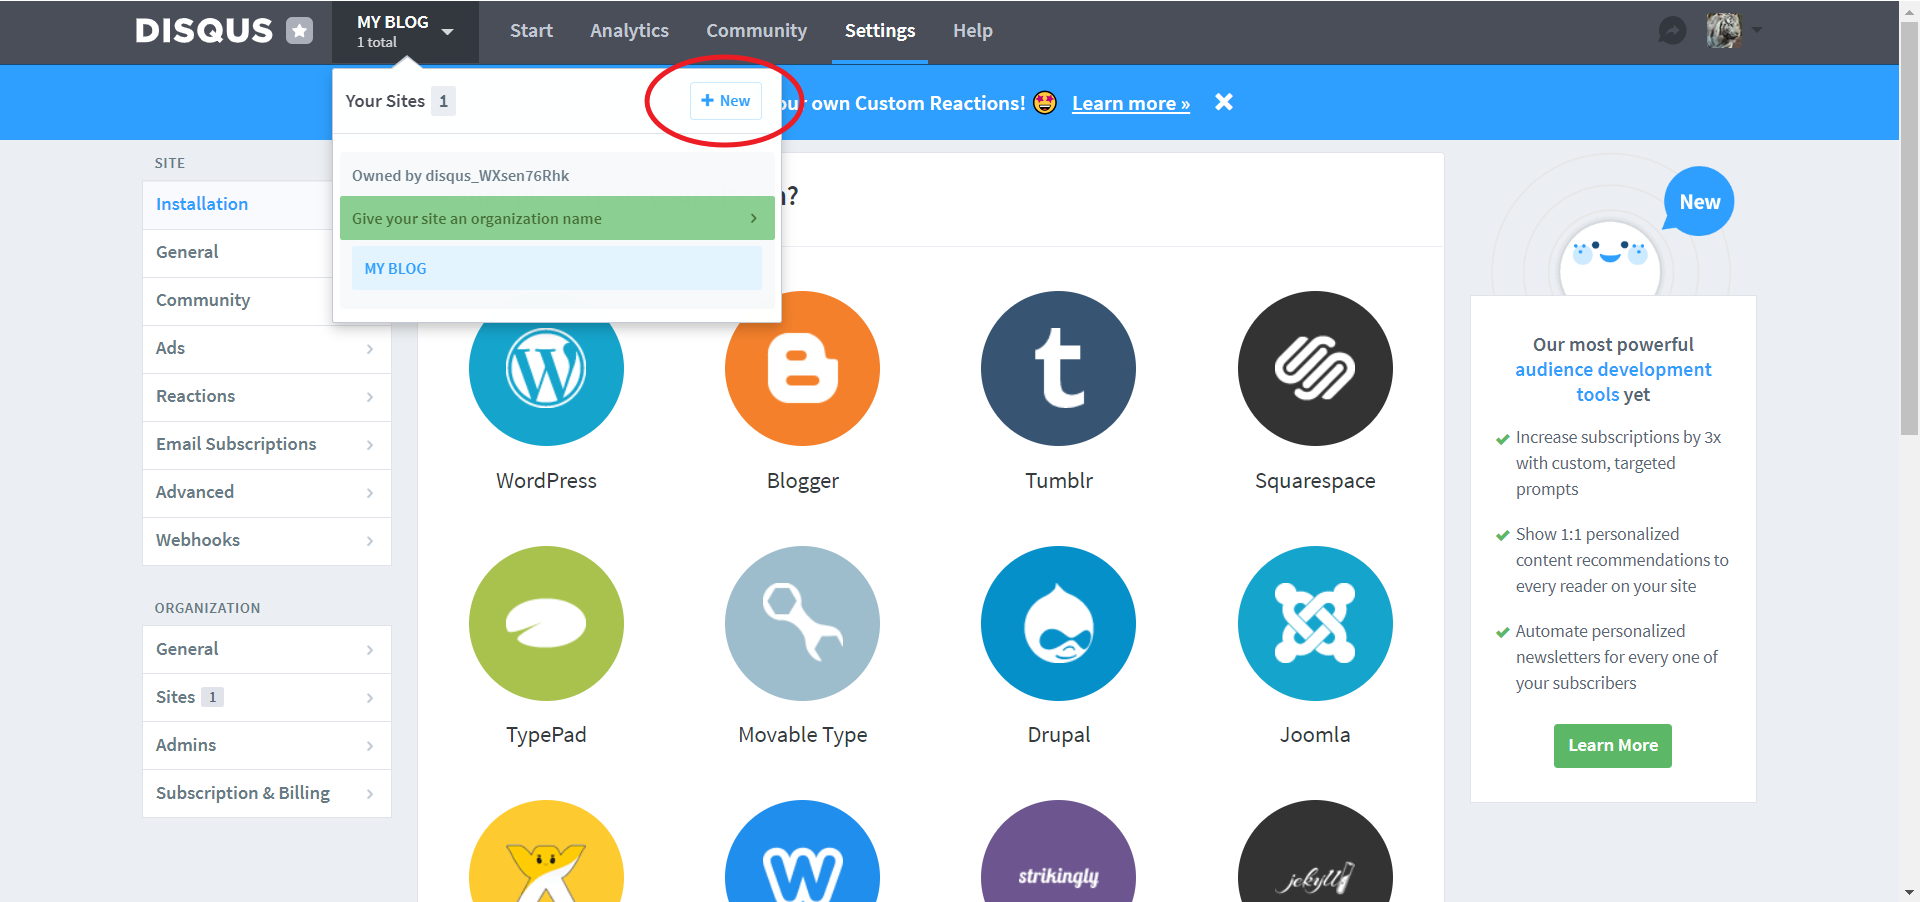
  2. 新增一個 Site

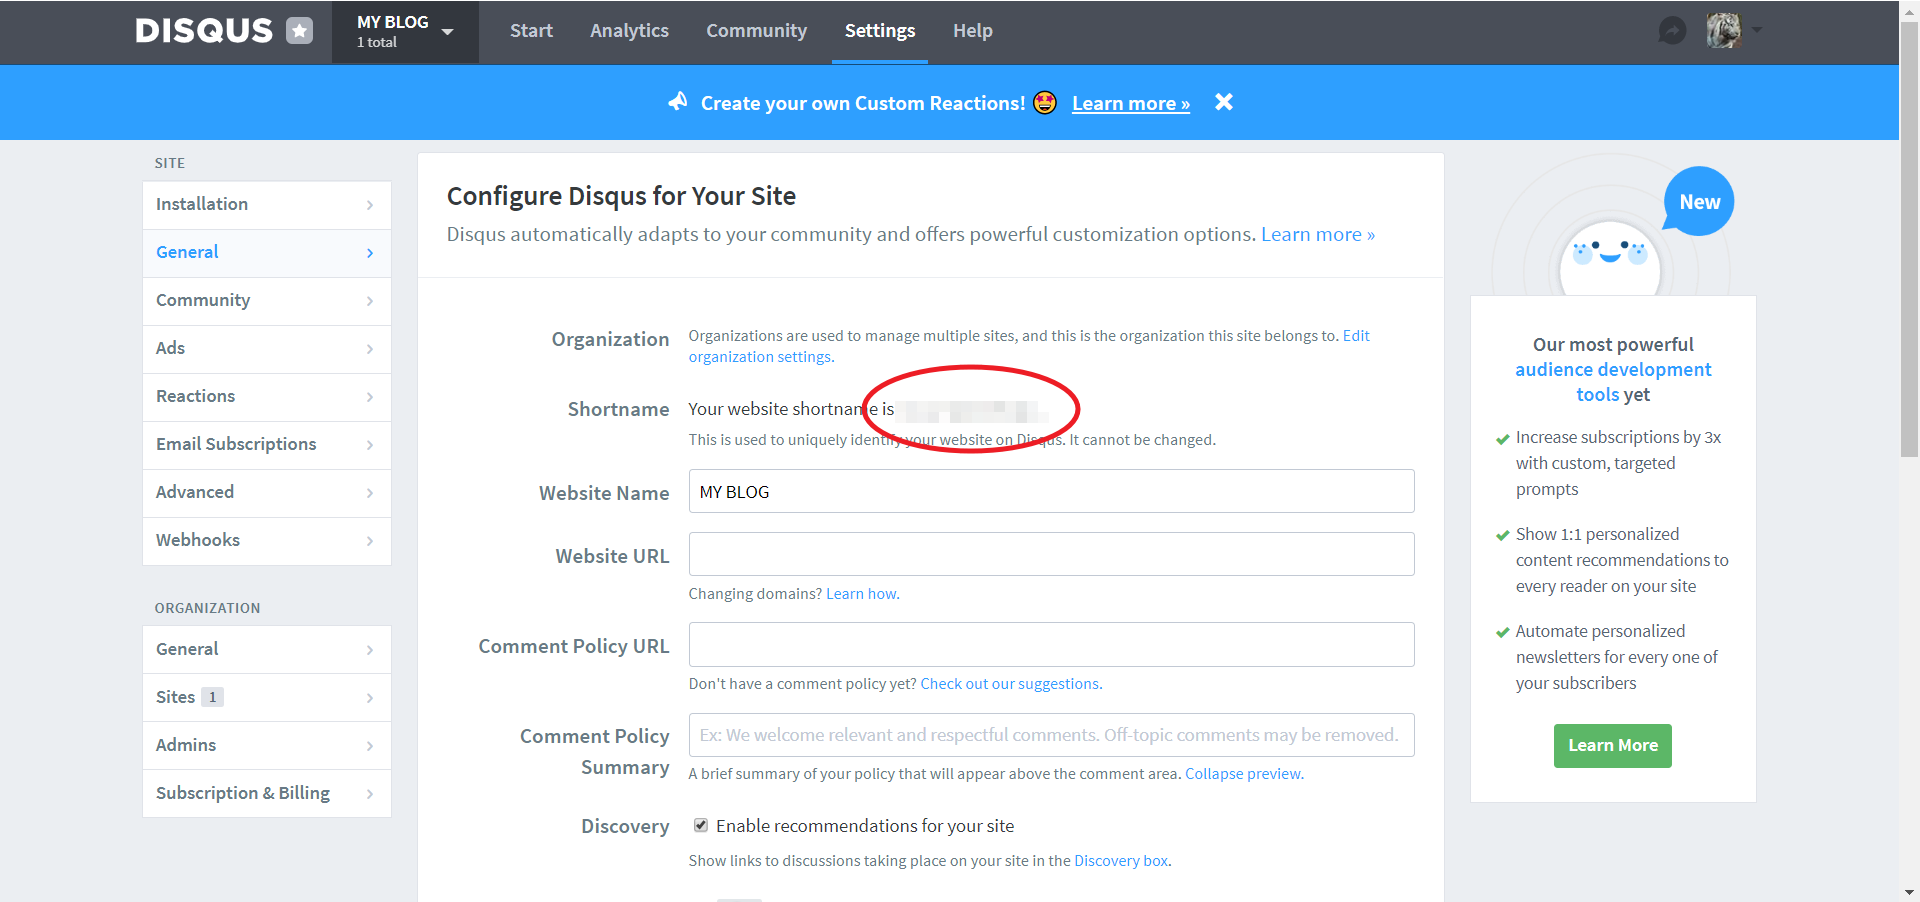
  3. 新增完後點選 “general” 並複製 “Shortname” 欄位

  4. short name 貼到 /themes/minos/_config.yml 的 “comment” 的 “install_url”
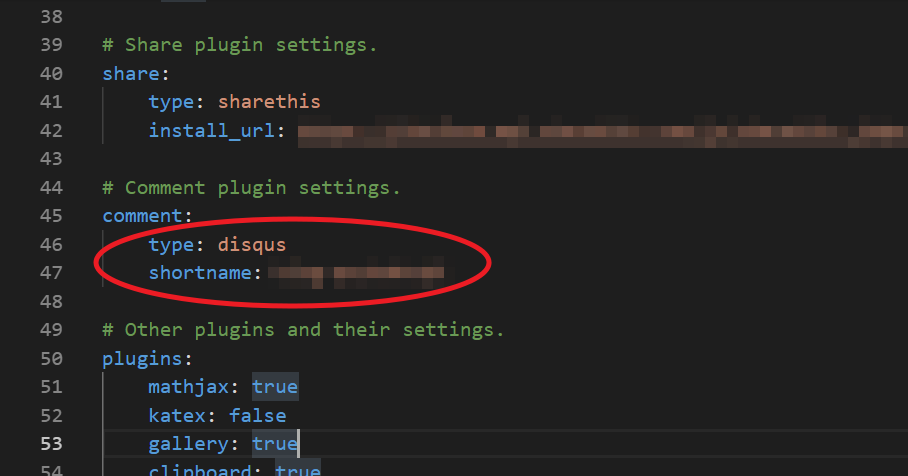
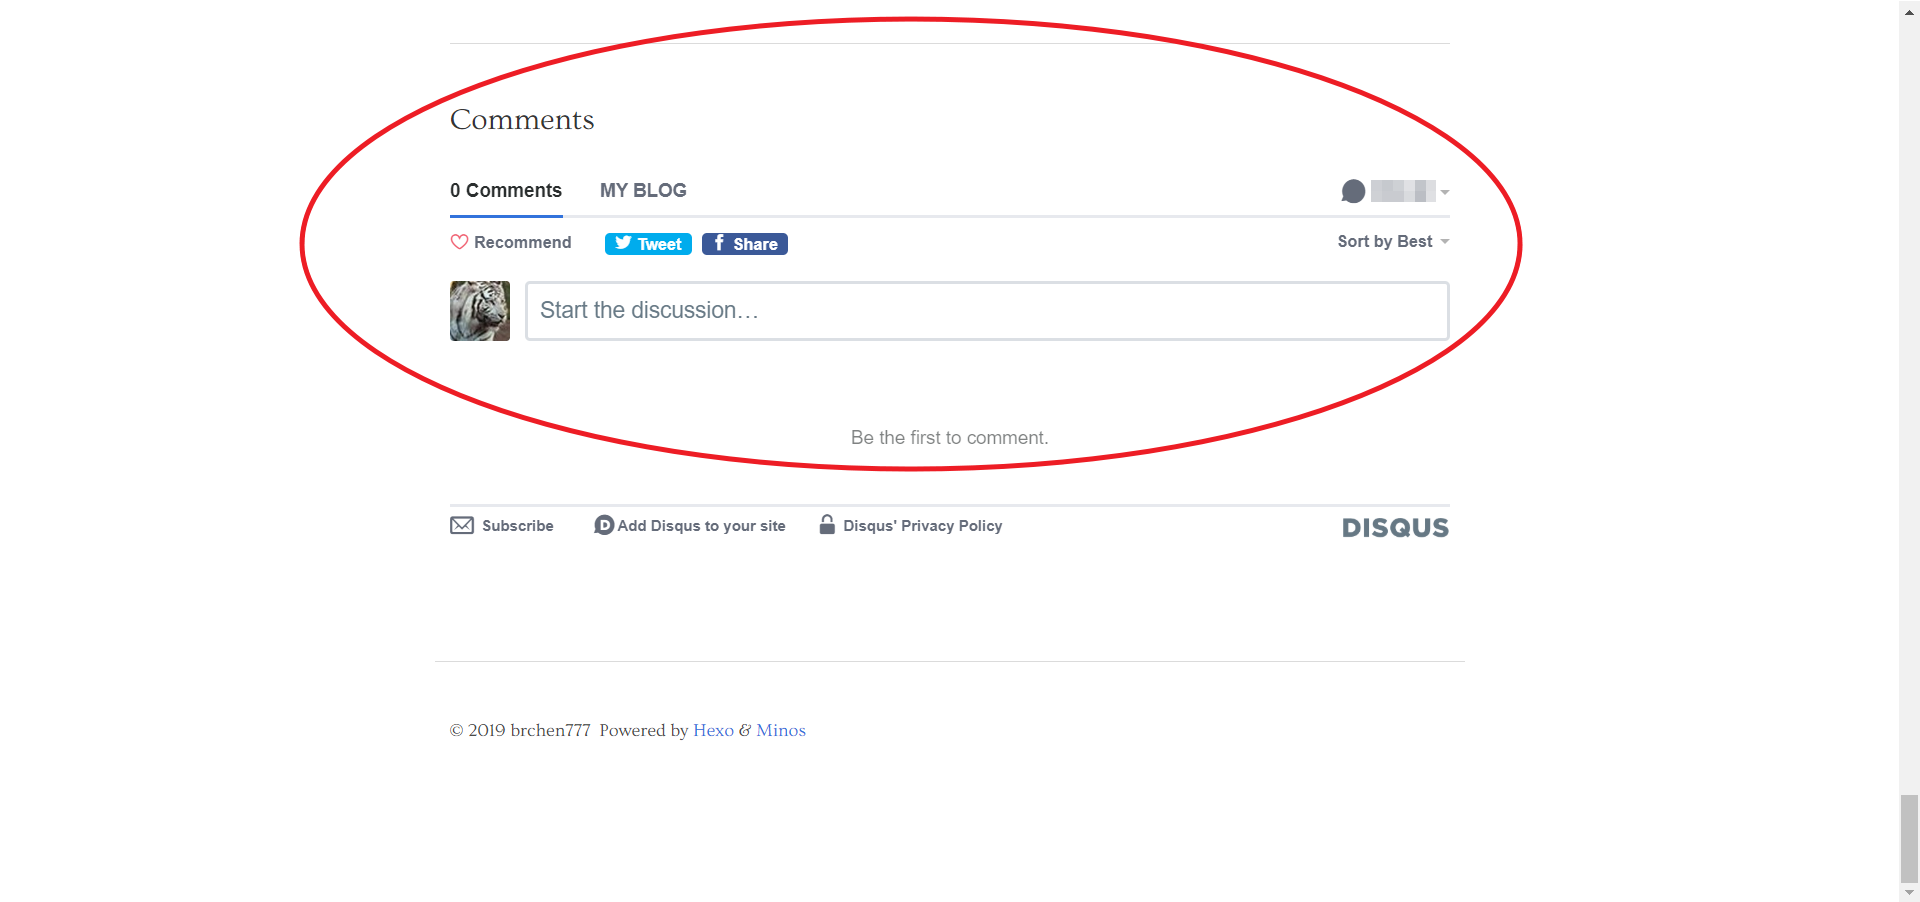
  5. 設置成功的話網誌最下方會出現留言功能

追蹤

這邊是用 Google Analytics

  1. Google 帳號登入

  2. 新增網站

  3. 追蹤碼貼到 /themes/minos/_config.yml 的 “Other plugins and their settings.” 的 “google-analytics” 的 “tracking_id”
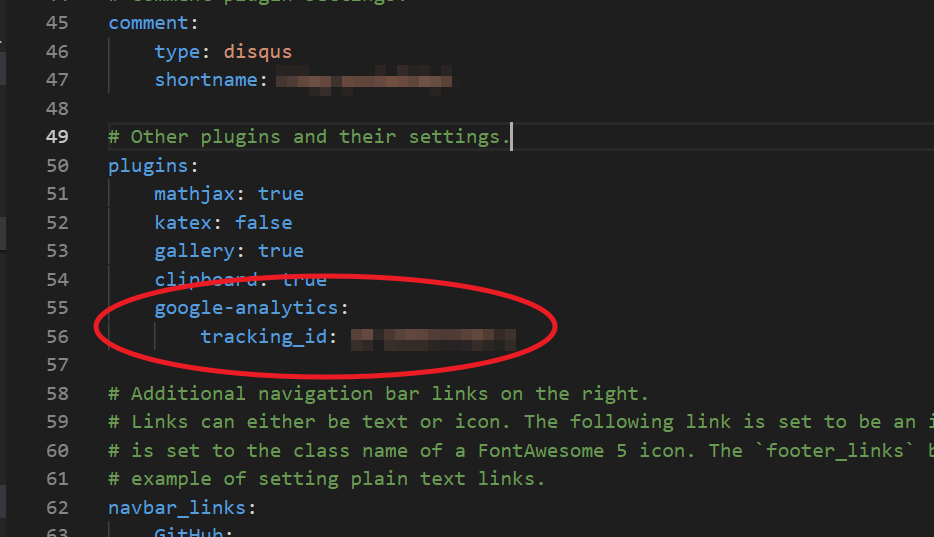
調整網站 Menu

Menu 是這個:

可到 /themes/minos/_config.yml 來做調整:

更換 DNS Server

Google Domains 的功能滿陽春的
因此換到 CloudFlare 多了一些分析功能 (有些要付費)

  1. 註冊帳號

  2. 點選 “Add a Site”

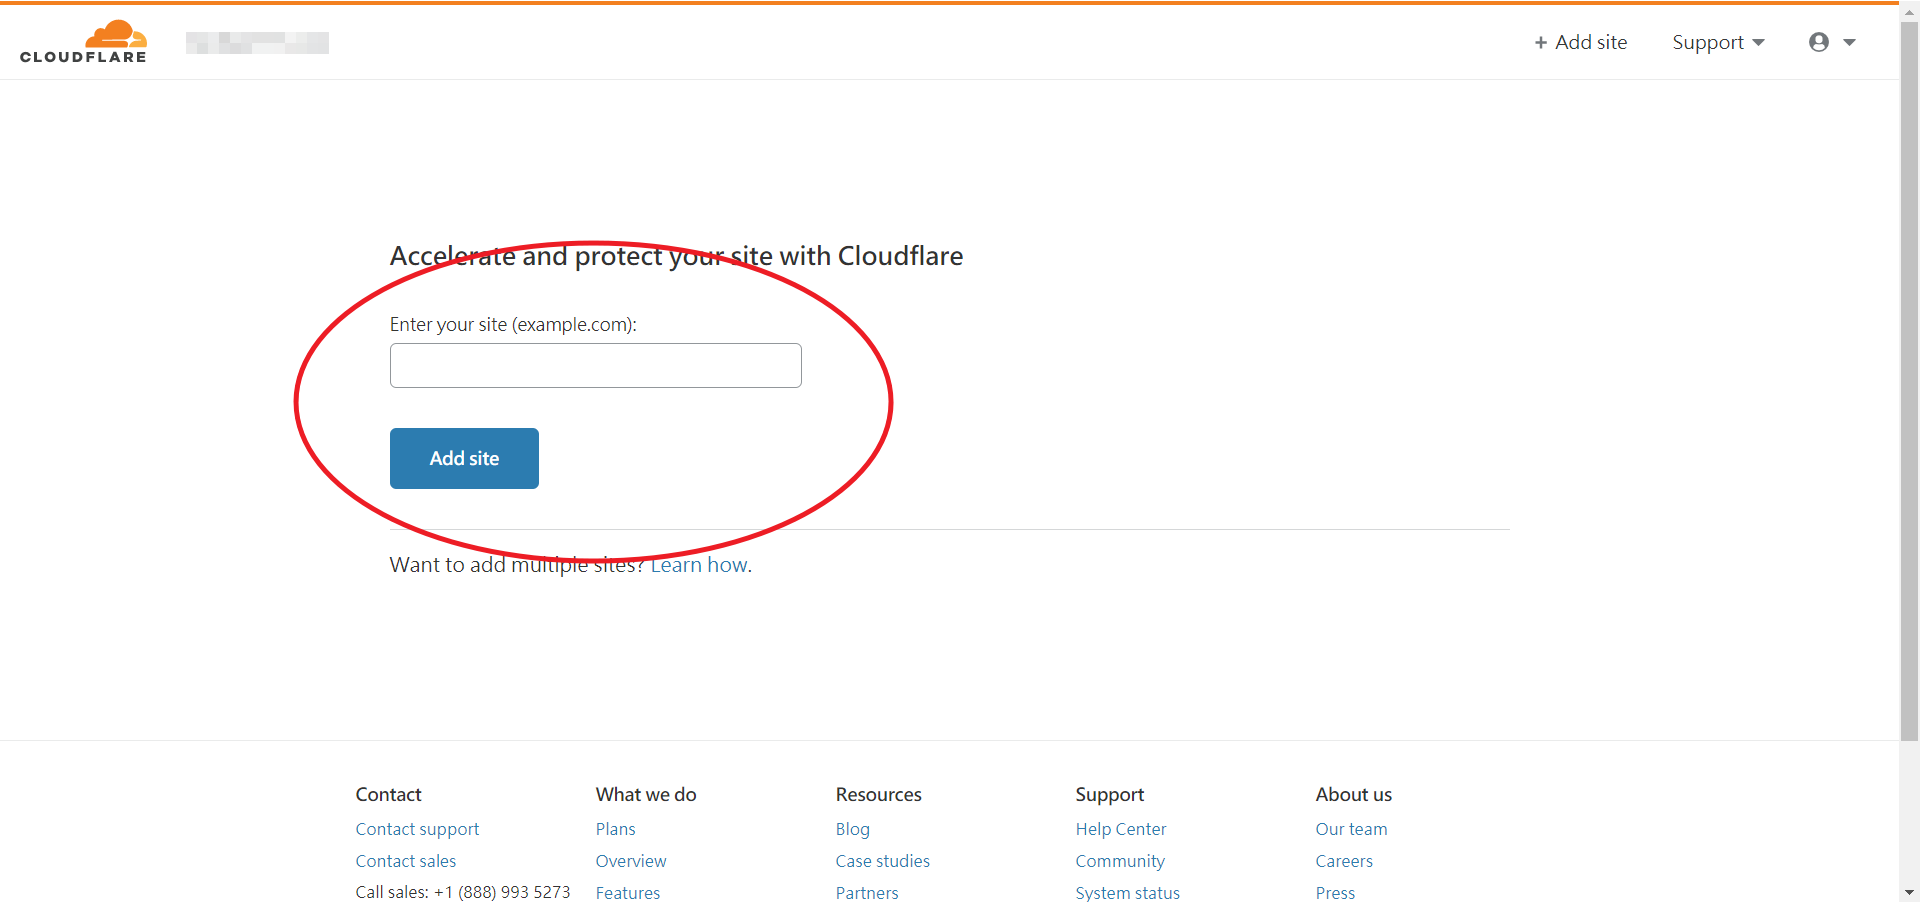
  3. 填入 Blog 網址後點選 “Add site”

  4. 等待 CloudFlare 掃描
    基本上 “電子郵件轉寄” 與大部分 “自訂資源記錄” 的設定都會完整複製過去
    有缺少再補即可 (如 VPS 設定沒有複製過去)

  5. 複製 CloudFlare 提供的 DNS Server

  6. 回到 Google Domains -> DNS -> 名稱伺服器
    選擇 “使用自訂名稱伺服器” 並填入剛複製的 DNS Server 網址
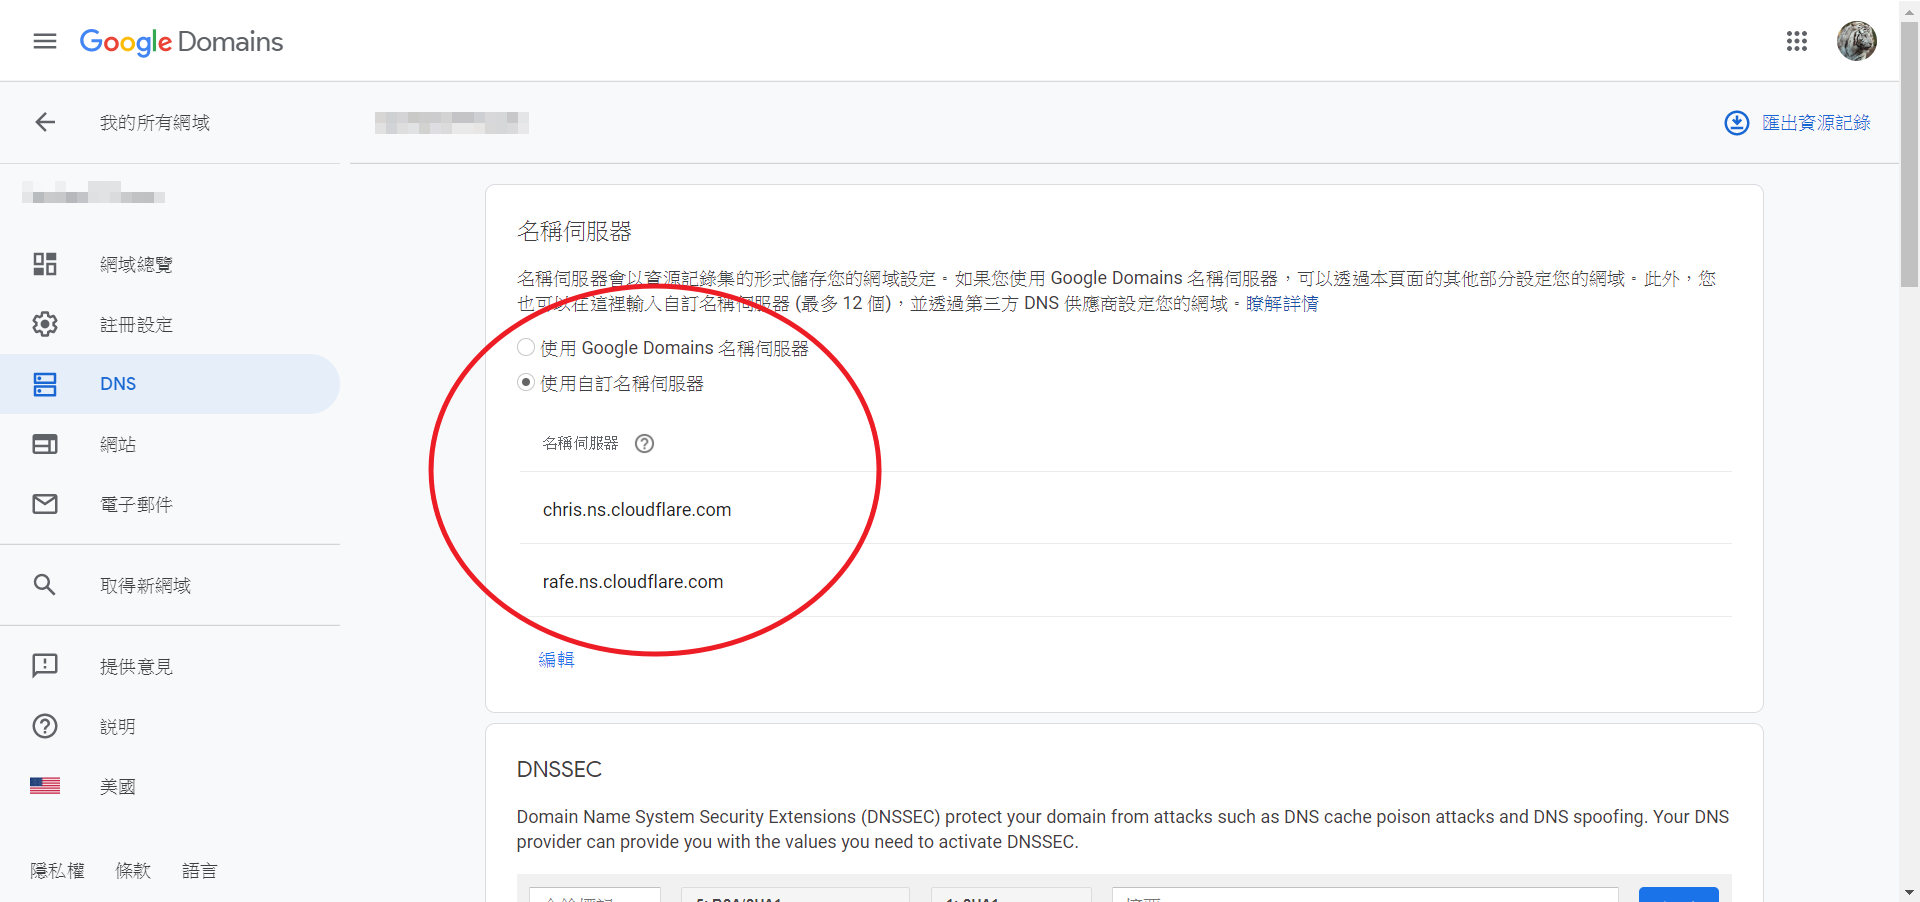
更新 Blog 後刪除 Cache

使用 CloudFlare 後,網站就會有了 Cache 功能
如果你更新網站想馬上看線上站的結果
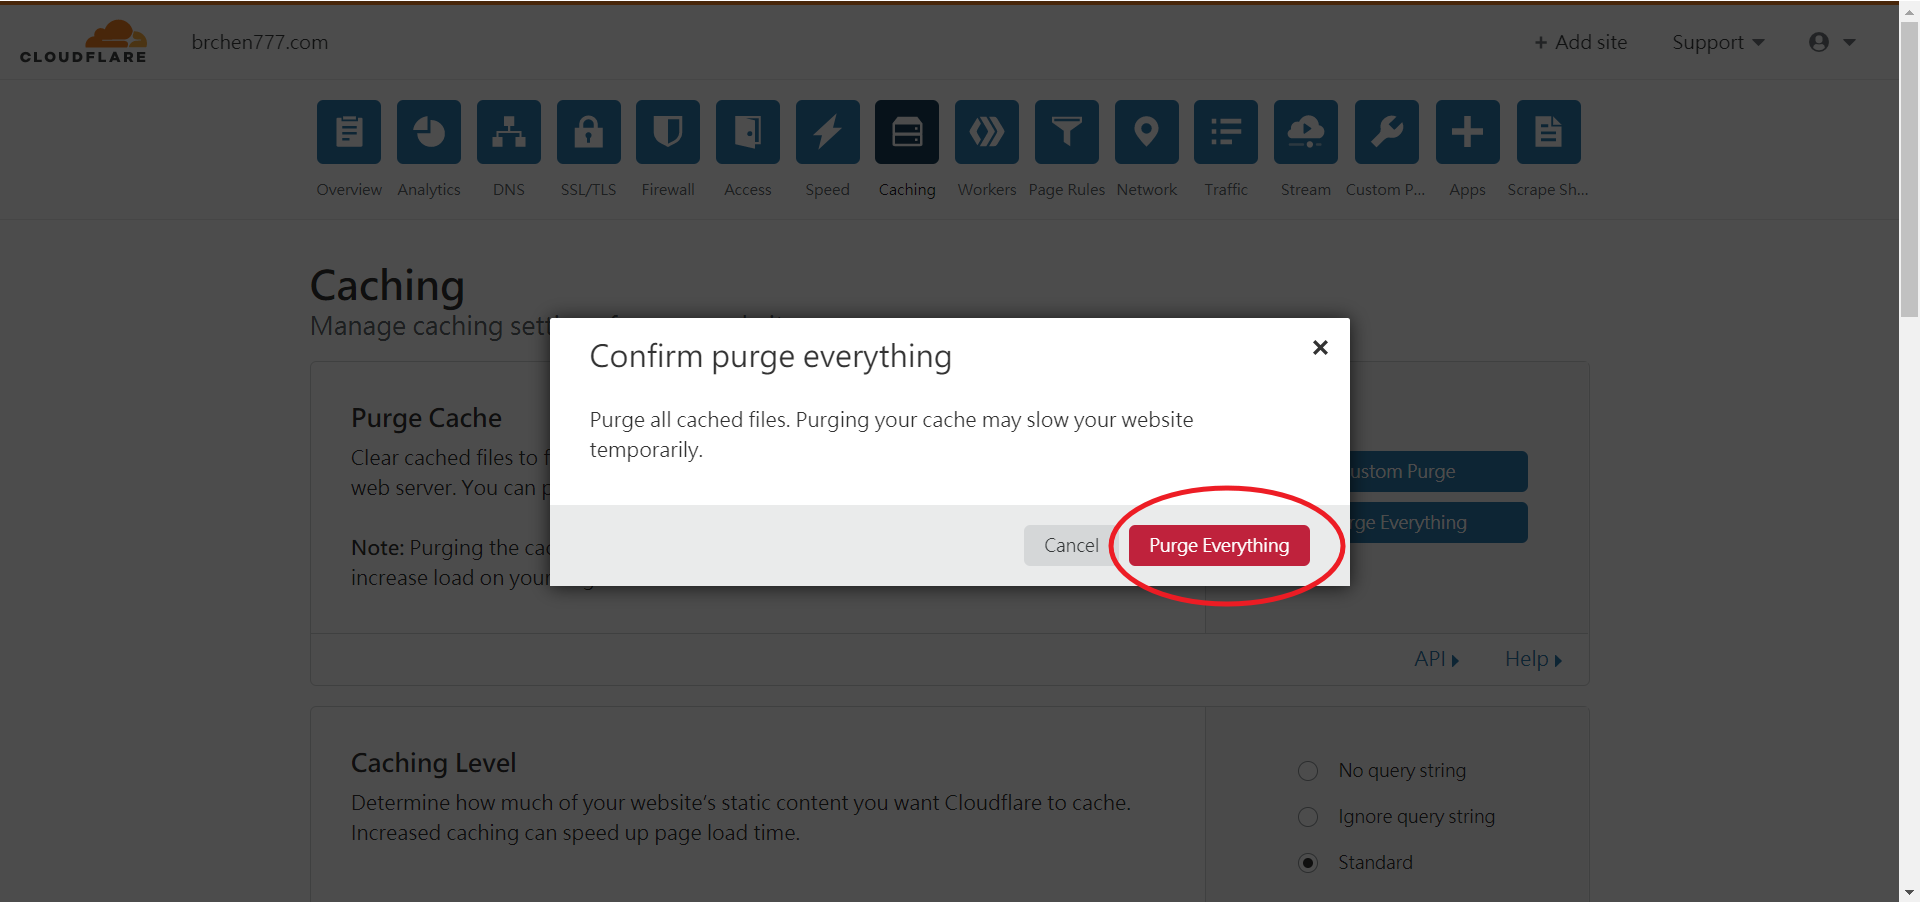
可到 Caching -> Purge everything,點選 “purge everything”
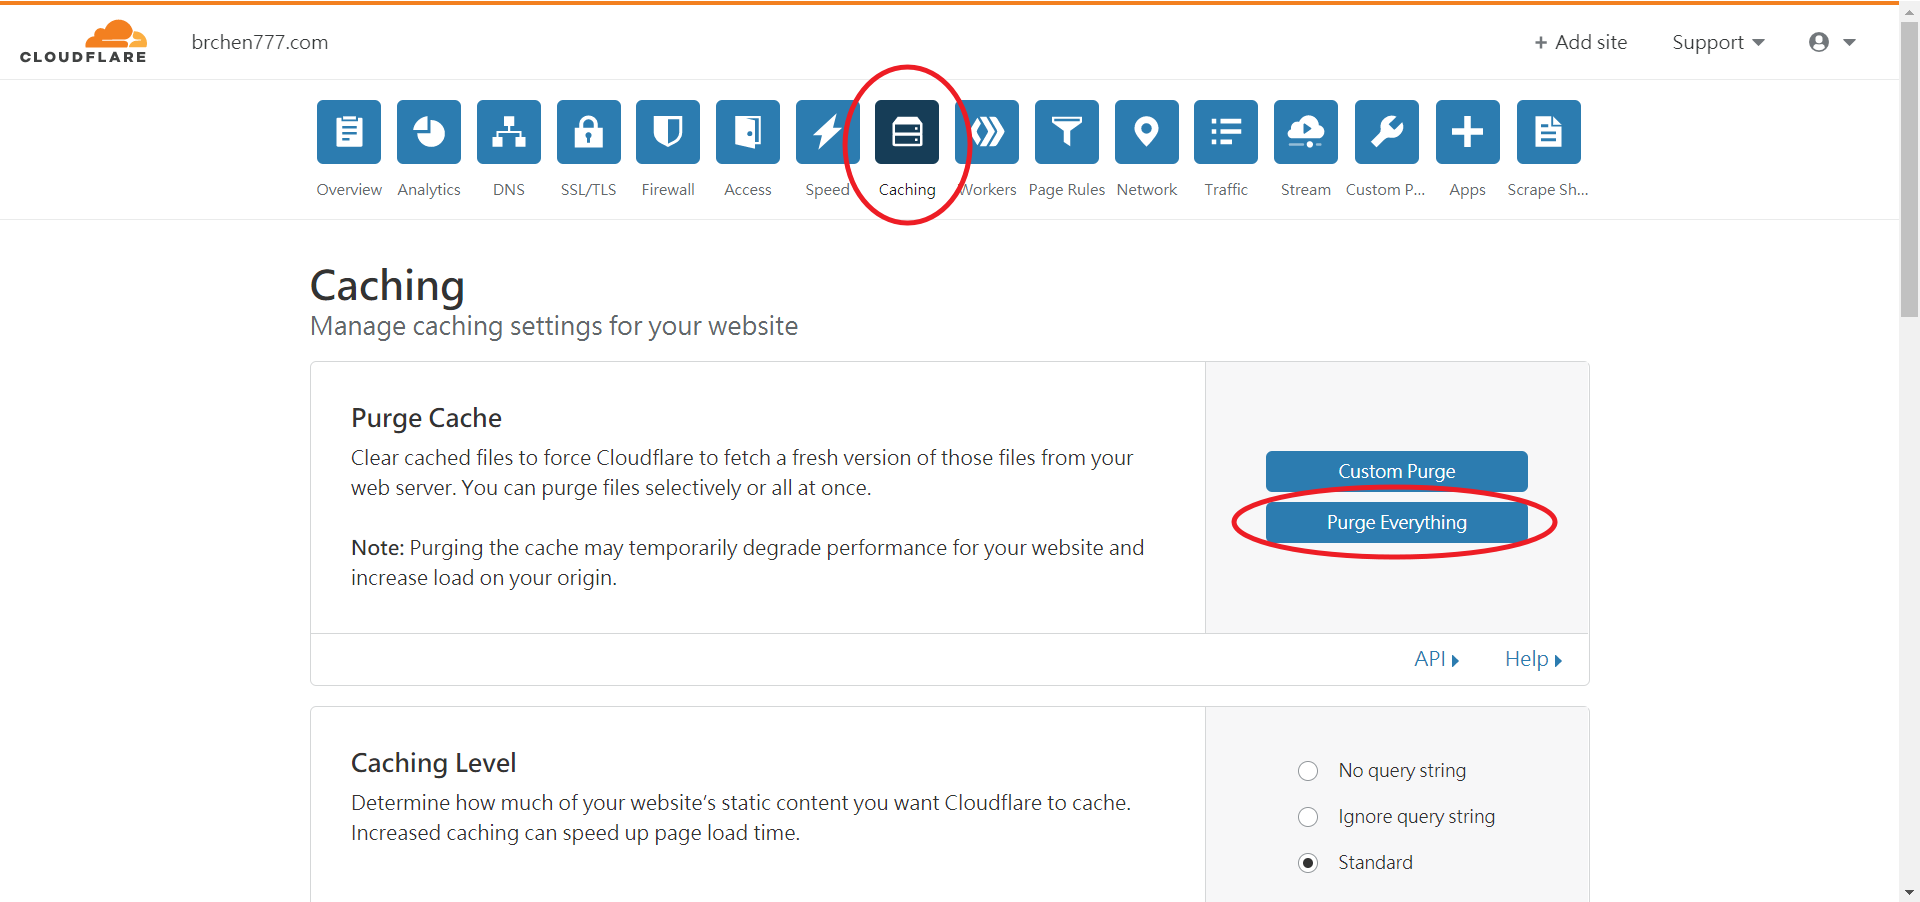
緣由

原本想要一個較個人風的 email
參照 網路上 得知 Google Domains 不只提供 domain 同時提供指定 email 轉寄的功能
就直接照 這篇 來購買一個 domain
Google 相較其他網域商,雖然價格貴一點點,但每年價格都很一致
不像有些強打第一年優惠但第二年以後價格快翻倍跳反而比 Google 的還貴
在這邊最便宜的一年 9 USD,商用字詞的約 1X USD 即可入手 (我是買 12 USD 的)

設定 Email 轉寄

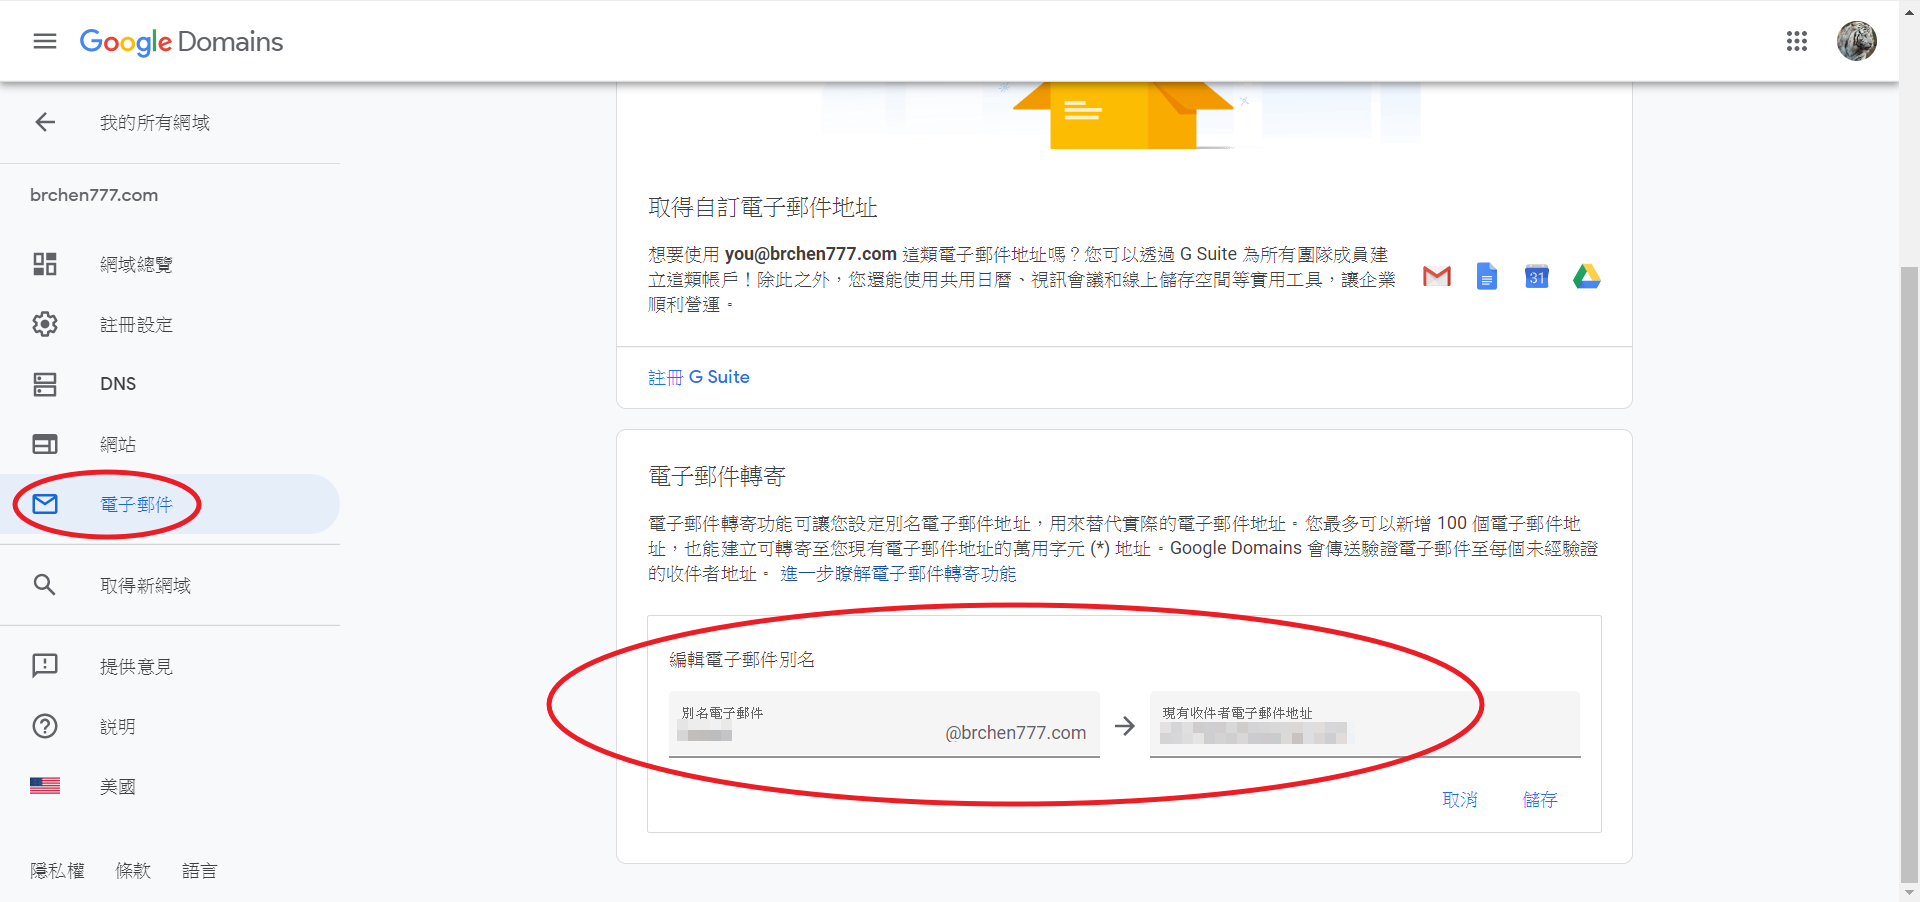
  1. 購買網域後,進入設定頁 -> 電子郵件

  2. 最下方 “電子郵件轉寄” 填入你想要的別名與轉寄的地址,儲存後就會轉寄了

利用 Hexo 與 GitHub Page 建立免費的靜態 Blog

所需環境與工具

  1. 一個 GitHub 帳號

  2. NodeJS

  3. Git

建立一個 Repository

  1. 登入 GitHub

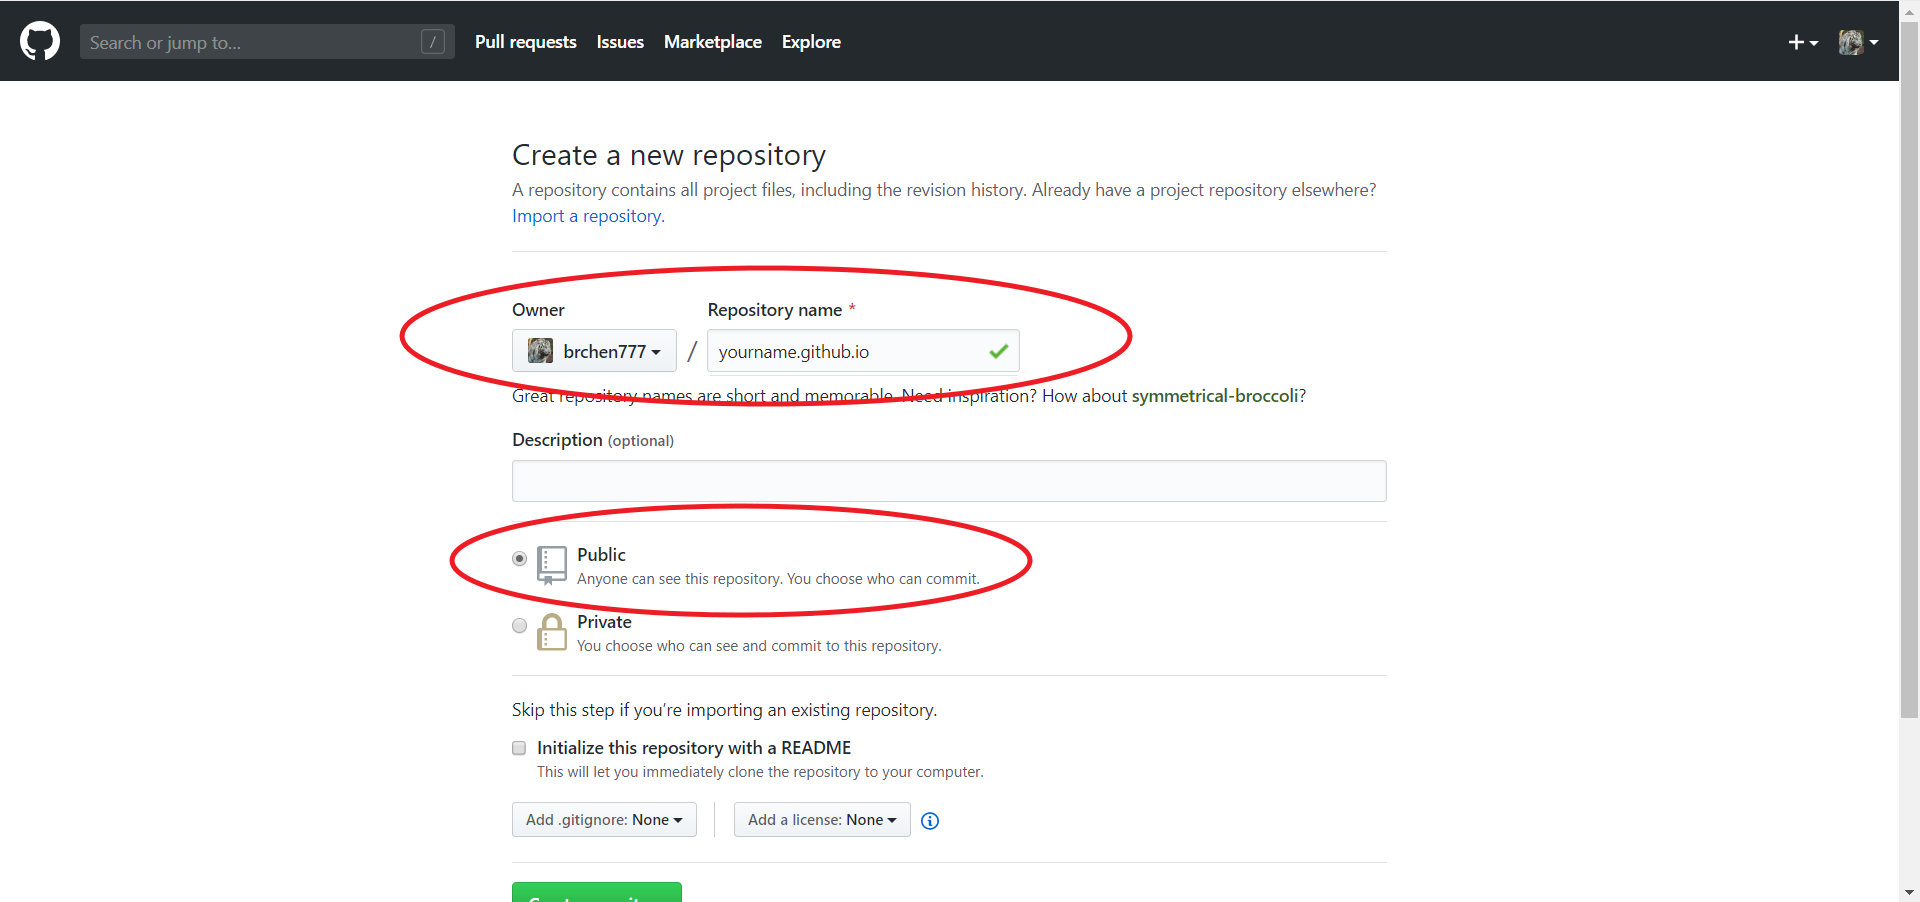
  2. 建立 Repository

  3. name 填入 yourname.github.io (yourname 請改成你的 GitHub ID)
    下方的 type 記得請勾選 “public”

安裝 Hexo

1
2
3
4
$ npm i hexo-cli -g
$ hexo init blog
$ cd blog
$ npm i

安裝 Hexo Git

1
$ npm i hexo-deployer-git

安裝 Blog 主題

這邊我們以安裝 minos 為例子
其中 minos 需要 hexo-renderer-sass 這個套件

1
2
$ git clone https://github.com/ppoffice/hexo-theme-minos.git themes/minos
$ npm i hexo-renderer-sass

調整設定

在 blog 資料夾內可以看到 “_config.yml” 這個設定檔案
打開後在中下方有個 theme 的部分改成:

1
theme: minos

最下方 deploy 的部分則改成:

1
2
3
4
deploy:
type: git
repository: http://github.com/yourname/yourname.github.io.git
branch: master

這裡的 “yourname” 改成你的 github 帳號
其他更詳細的設定可參考 這裡

開啟 Server

1
$ hexo s -p [port]

預設在 http://localhost:4000 看 Local Page (裡面會有一篇 Hello World)

建置靜態網頁

把 Markdown File 轉成網頁

1
$ hexo g

發佈到 GitHub Page 上

1
$ hexo d

或是你也可以建置、發佈一起做

1
$ hexo d -g

網站轉址

既然我們已經有 Google Domain 跟 Hexo + GitHub Page 產的 Blog,該是串起來的時候了

設定 DNS

到 Google Domains 設定頁 -> DNS -> 自訂資源紀錄
添加一筆 Type A,IP 如下:

  • 185.199.108.153
  • 185.199.109.153
  • 185.199.110.153
  • 185.199.111.153

再添加一筆 CNAME:
name 填 subdomain (例如 “blog”)
data 填 yourname.github.io (yourname 請改成你的 github ID)

填完顯示如下:

設定 GitHub Page 的 Domain

  1. 在 /blog/source 資料夾建立 CNAME 檔案

    1
    2
    $ cd /blog/source
    $ touch CNAME

  2. 檔案內填寫入

    1
    subdomain.domain.com

    假設我的 subdomain 是 “blog”
    我買的 domain 是 brchen777.com
    那在這邊要填入的會是 blog.brchen777.com

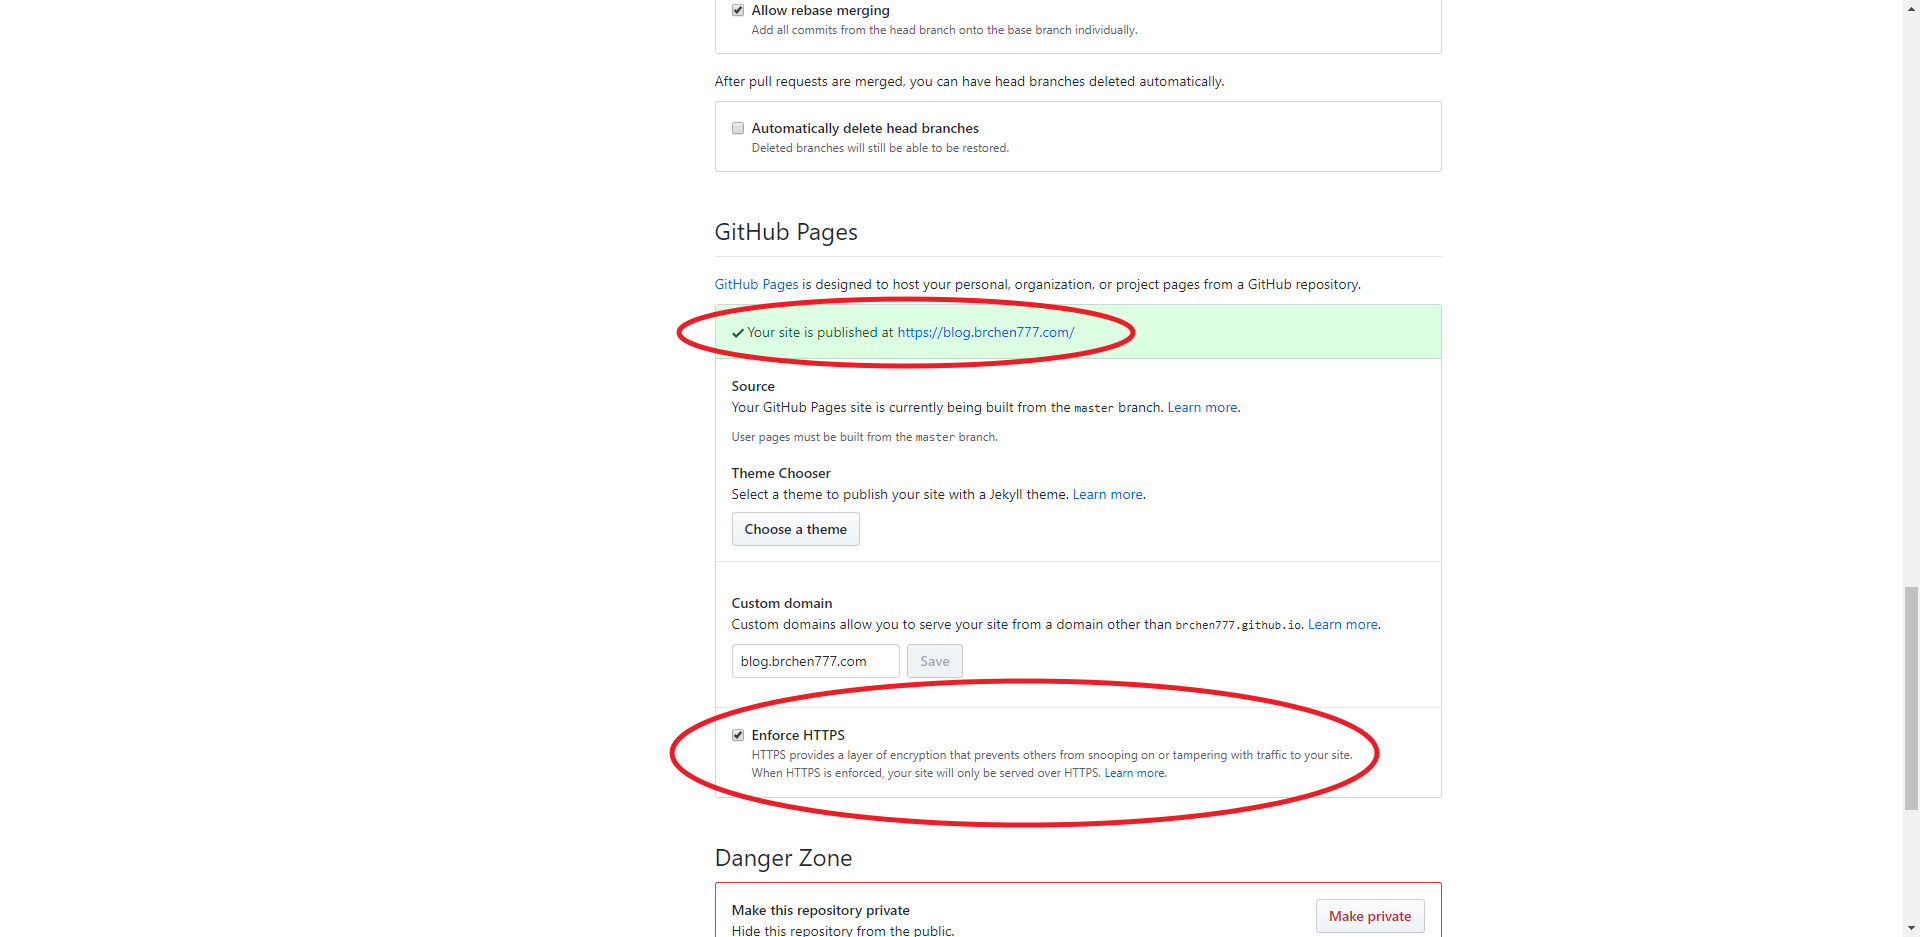
  3. 假設有填好,進入 GitHub Repository -> Settings -> GitHub Pages 區塊,會有 “Your site is published at XXX” 的訊息,其中 XXX 就是 blog 的網址,顯示如下:

  4. GitHub Page 有內建 HTTPS,網站設定好一段時間之後就有 “Enforce HTTPS” 可選 (如上圖的下方)

設定多個 Subdomain 指向同一個 GitHub Page

因為 GitHub Page 不支援多個 CNAME 設定,所以其他的 subdomain 要自行設定轉址
到 Google Domains 設定頁 -> DNS -> 綜合記錄
假設要把 “www” 這個 subdomain 轉址,新增一筆子網域轉址如下:

以這篇案例來說,www.brchen777.combrchen777.github.io 都會指到 blog.brchen777.com

參考資料

  1. 在 Google Domains 註冊購買網域名稱教學
  2. Hexo+GitHub,新手也可以快速建立部落格
  3. 如何搭建個人 Blog 使用 Hexo + Gitpage
  4. Hexo - 前端也能建置部落格!更換主題與發表文章篇
  5. Configuring a custom domain for your GitHub Pages site
  6. 自訂網域名稱:Google Domain
  7. Troubleshooting custom domains and GitHub Pages
Your browser is out-of-date!

Update your browser to view this website correctly. Update my browser now

×